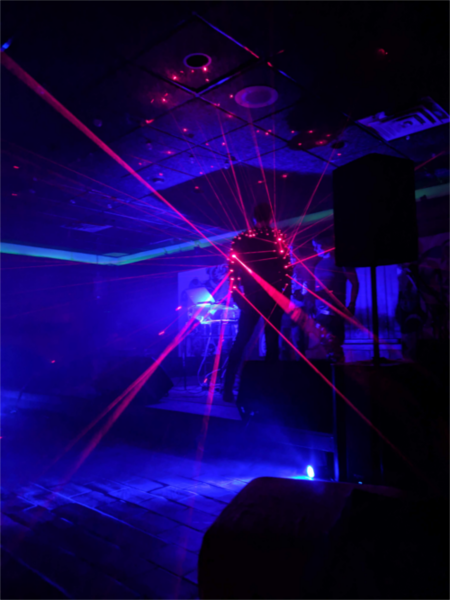
Inspired by Yoshii Kazuya’s laser-spiked outfit, github user abetusk decided to create an excellent version of the getup by embedding 128 laser diodes in his own jacket.
These lasers are powered by an Arduino Nano, along with a pair of I2C PWM output boards, allowing them to be switched in sets of four. The lasers can be controlled either by joystick, via a microphone in order to react to sound, or in a looping ‘twinkle’ pattern.
“The basic design is to attach 128 laser diodes to the arms, shoulders and upper back of a ‘moto’ jacket and provide power and control to the laser diodes with electronics. The electronics are put into a housing and all wires, electronics and their housing are hidden in the interface between the outer jacket shell and the inner lining.
A joystick and microphone are used for input. Power is provided by a LiPo rechargeable battery.
The basic components are:
- Laser diode housing and attachment
- Electronics
- Electronics Housing
- Wiring and connection
The basic workflow is roughly as follows:
-
Assemble the laser diodes with their connectors and housing
-
Attach the laser diodes to the jacket
-
Solder the electronics and assemble them in their housing
-
Create the cabling and connect the laser diodes to the electronics
-
Wear it”
Assuming the availability of soldering iron, multimeter, wire strippers, laser cutter and many other basic parts, the estimated cost of the project is about $300 in raw materials and about 20 hours worth of labor.
Watch the demonstrative video below or jump on Github for Arduino code and other files needed to build your own.
