How many of you are using electronics to make art? Joe Salatino is one of them.
Few days ago Arduino Blog posted Joe Salatino’s project: a robot capable to paint in an autonomous way, portraits.
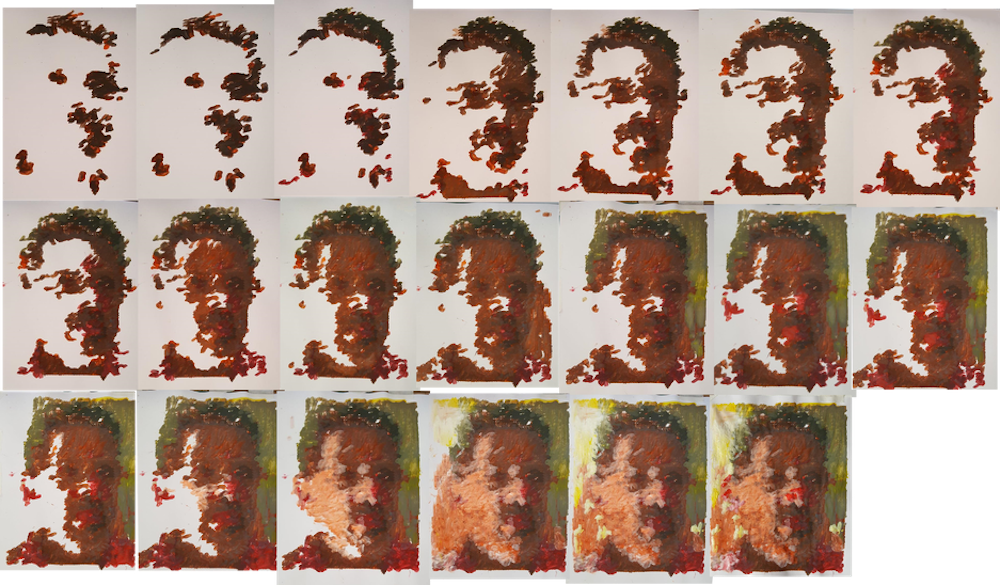
The painting robot was built by Jose Salatino, a painter gone roboticist that used to go around making portraits to famous musicians and giving the paintings away to them. He told me that this is how he started in the art world. At some point he wanted to bring together his life passion with his hobby (electronics) and got interested into painting robots (seems like there is a whole niche there I haven’t explored yet) and realized that very few people were really using a painter’s technique to mix the colors. That triggered him into learning more about machines in general, and machines that could paint in particular.
The Painter consists of a Cartesian machine that is simpler, cheaper and easier to control than a robotic arm. A Raspberry pi is used for the image processing and an Arduino to control the mechanical parts.
The painter robot, which I came to call Van Gogh because of its painting style, is a two-axis machine that can be programmed to move all over the canvas. The machine uses the technique of creating a color by mixing first basic pigments (blue, yellow, red) and then dipping the brush again into one of a series of containers grading from white to black. This is, Jose told me, how he would mix the paint: first dip into the different containers of basic color (e.g. to make a bright green, need to dip once in blue and maybe three times in yellow), second assign the luminosity by dipping into a certain gray color. When asked about whether the paint containers would not get dirty by doing so, Jose replied that so it goes when painting for him. The colors get dirty on the palette and you need to keep on adding new color. And this is when I realized that I was totally over engineering the project in my head when I tried to imagine how I would do it.
You can find more information at Arduino blog o at project’s Hackaday page.
