- makeITcircular 2024 content launched – Part of Maker Faire Rome 2024Posted 2 weeks ago
- Application For Maker Faire Rome 2024: Deadline June 20thPosted 2 months ago
- Building a 3D Digital Clock with ArduinoPosted 7 months ago
- Creating a controller for Minecraft with realistic body movements using ArduinoPosted 7 months ago
- Snowflake with ArduinoPosted 8 months ago
- Holographic Christmas TreePosted 8 months ago
- Segstick: Build Your Own Self-Balancing Vehicle in Just 2 Days with ArduinoPosted 8 months ago
- ZSWatch: An Open-Source Smartwatch Project Based on the Zephyr Operating SystemPosted 9 months ago
- What is IoT and which devices to usePosted 9 months ago
- Maker Faire Rome Unveils Thrilling “Padel Smash Future” Pavilion for Sports EnthusiastsPosted 10 months ago
How to add a smartphone-controlled brain to your 3D printer for about fifty bucks
One way vendors have been able to keep costs down is by requiring buyers to dedicate a PC to driving the printer. Because it can take hours, or even days, for a print to complete, it can become quite inconvenient to have to leave a laptop sitting next to the printer, merely to make sure the motors on the printer keep running.
Printers like the LulzBot Mini, a very powerful little printer which relies entirely on a computer controlling it over USB, are very cheap but with a really high quality. Unfortunately it relies completely on a dedicated PC to manage the printing process, so the overall solution cost is so high.More expensive printers like the MakerBot, are PC independent and provide network control and a smartphone monitoring interface.
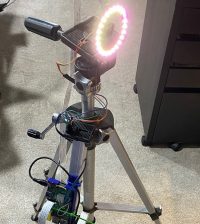
But those remote monitoring functions can be made through a cheap and commonly available Raspberry Pi, thanks to the OctoPrint project. It’s an open source, volunteer effort by Gina Häußge, a developer in Obertshausen, Germany. OctoPrint runs as a server on the Raspberry Pi and provides a Web interface for commanding and controlling the printer. Another developer, Guy Sheffer, created a custom distribution of Raspbian (itself a customized distribution of Debian), which is called OctoPi.
As the video above shows, all you need to do is download the distribution to a computer, write a bootable image to a microSD card, move that microSD card to the Raspberry Pi, plug that bad boy into your printer, and let it boot. Then connect to it via either its local IP address or at octopi.local, and you’re all set.
Ah, but once installed, you get a wonderment. Seriously. When I fully considered that I had set up a machine controller, Web server, and smartphone interface on a computer that costs about fifty bucks, I had to spend a moment appreciating how far technology has come, and how much the open source environment has contributed to the maker movement.
Source: ZDNet


