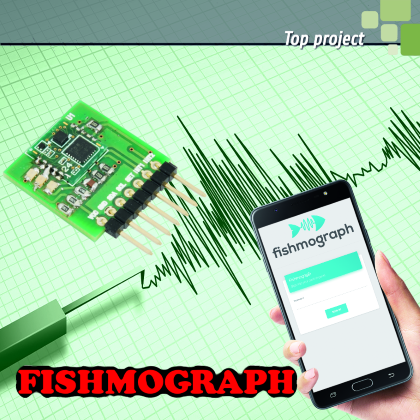
Fishmograph allows to precisely monitor earthquakes involving our house using the D7S sensor, sending us an email notification for every event detected, allowing us to take people and things to safety.
Italy is one of the Mediterranean countries with the highest seismic risk and this very unfavourable record is due to its geographic location, riding across the African plaque and the Euroasian plaque (we are talking about tectonic plaques); this “unfavourable” position causes the very high number of earthquakes taking place every day in our country, which, however, fortunately, are so weak that can be detected only by instruments, whilst a very small percentage has enough intensity to cause damages to people or things.
Electronic devices are very sensitive to seismic events which can damage them even irreparably, therefore, in case of a seismic event of sensible intensity, the ideal solution would be to have a device capable of detecting high-intensity earthquakes and autonomously decide when to disconnect our devices from power, therefore preventing further damages. We can easily think about problems and dangers caused by a high-voltage tower collapsing, or, inside our house, damages to natural gas pipes or electric wiring; such problems should be avoided by acting timely on the systems and securing them before they turn into a danger. In the case of gas pipes, we can close and electro evolves installed upstream to it and, for the electric system, we can act on an electrically-activated selector. Fishmograph (the project herein described) has been created specifically for this and it allows to monitor, with high precision, seismic events involving our house, sending us an instantaneous notification at the beginning of an earthquake event and notifying when the danger threshold is reached, reminding us to turn our devices off and limiting possible damages.

The project
Fishmograph is based on Fishino 32 and the excellent low-cost D7S sensor developed by Omron.
This sensor, which we have previously introduced and analyzed in this magazine in issue 222, guarantees a high degree of precision when detecting earthquakes and has the very useful automatic danger level evaluation feature for electronic devices, emitting a shutoff signal when intensity is 5 or higher on the JMA (Japan Meteorological Agency) intensity scale, or it can emit a collapse signal when a variation in its physical position is detected (possibly due to the floor collapsing).
Our project is also composed of a web app we can use to monitor the history of detections or to act on the configuration of the sensor itself, initializing it or running an auto-diagnostics procedure aimed to detect possible internal malfunctions. Another important feature offered by the web app is the possibility to save the recipients for the email notifications sent out by Fishmograph whenever an earthquake is detected.
Configuration and installation
In order to use Fishmograph, we have to update Fishino 32 to the latest firmware version available and download the latest library release since there is a fix for the integrated RTC used in this project. It is as important to install the D7S library in Arduino’s IDE, which allows piloting the namesake sensor, as well as the SMTPClient library, for sending out email notifications.
You can see the connection between the sensor and the Fishino 32 in Fig. 1, where you can notice that we have to connect pins INT1 and INT2 with two pins of Fishino 32 capable of handling interrupts and connect the I²C bus to power. It is also recommended to use a LiPo battery capable of powering up Fishmograph even during a blackout, therefore guaranteeing the continuity of the detection procedure; of course, email notifications cannot be sent when there is no Internet connectivity.
After all the connections are made, we have to copy the web app code in the root of a microSD memory card and insert it in the dedicated slot on Fishino 32; the card will also be used as storage for all the application data, i.e. the detection history and the list of email notification recipients. Now, we can proceed and configure the sketch; List 1 shows the dedicated code section.

Fig. 1
INT1_PIN and INT2_PIN indicate, respectively, the pins of Fishino 32 to which INT1 and INT2 outputs of the D7S sensor have been connected; WEBAPP_DEFAULT_PASSWORD is the default password from the web app and if we can, of course, edit it by accessing the dedicated page inside the web app.
As a default, email notifications are disabled and we have to “de-comment” ENABLE_EMAIL_NOTIFICATION in order to enable it and initialize that subsequent constants using the data for the SMTP server we use; we remind you that de-commenting means removing the double slash (//) preceding the instruction, so that Fishino will interpret it as an instruction and execute it.
In our example, we have used Gmail, however, in order to allow Fishino 32 to use this SMTP server, we have to enable “least secure apps” from our Google account, browsing to https://myaccount.google.com/lesssecureapps and, on the webpage, activating the corresponding slider (Fig. 2).

Fig. 2
Once we have enabled Fishino access to our Google account, we must code our email address in Base64, that is our complete account name for@gmail.com (for instance, pippo@gmail.com) that will be used as a username during the communication with the SMTP server, and the access password to our account. In order to do that we can make use of a very useful online service, at http://www.base64encode.org, which allows us to code in Base64 without having to install anything on our computer. The coded email address and password output must be copied, respectively, in SMTP_LOGIN and SMTP_PASSWD.
SMTP_FROM_NAME and SMTP_FROM_EMAIL represent the sender of the email indications. If we use Gmail, we have to insert our complete and exact email address in the second field, while we can use any name we want in the first one, for instance, Fishmograph would be a good choice.
Now, we can load the sketch on our Fishino 32 and, by connecting to the IP address set in the Wi-Fi connection parameters, we will see the web app (the initial loading time for the web app might require a few seconds, due to the dimension of the file the browser has to download before launching it). In order to test Fishmograph for its correct functioning, we can configure a receiver inside the web app and move the D7S sensor until it detects the “fake earthquake” we caused, if we receive a notification in our email inbox, the system works correctly.
To increase the reliability of the detector, we should anchor the entire system to the floor, or firmly attach it to the wall using a metal rod; we should avoid pin-strips (because the mechanical anchoring is not firm enough) and connect the board using wires.
Listing1
//--- D7S ---
//D7S interrupt pin
#define INT1_PIN 3 //pin to which INT1 is attached
#define INT2_PIN 5 //pin to which INT2 is attached
//--- Network ---
//AP authentication
#define MY_SSID “ssid” //SSID
#define MY_PASS “password” //password
//IP Addresses
#define IPADDR 192, 168, 0, 200 //IP of the server
#define GATEWAY 192, 168, 0, 1 //Gateway of the network
#define NETMASK 255, 255, 255, 0 //Netmask of the network
//--- Webapp ---
//Webapp default password
#define WEBAPP_DEFAULT_PASSWORD “fish123”;
//--- Email notifications ---
//Uncomment the line below to enable email notifications
#define ENABLE_EMAIL_NOTIFICATION
//SMTP server information
//Remember: if you use a server that require TLS you need a client capable secure connections
#define SMTP_SERVER “smtp.gmail.com” //SMTP server
#define SMTP_PORT 465 //SMTP server port
//SMTP autherntication
#define SMTP_LOGIN “your email encoded in base64” //username encoded in base64
#define SMTP_PASSWD “your password encoded in base64” //password encoded in base64
//Email sender info
#define SMTP_FROM_NAME “Fishmograph” //Sender name
#define SMTP_FROM_EMAIL “sender@example.ext” //Sender email
//--- General ---
//Time for which the notification is valid. Expired this time the notification will be not sent
#define NOTIFICATION_VALIDITY_TIME 120000 //time in ms (2 minutes)
#define EMAIL_NOTIFICATION_WAIT_TIME 10000 //time to wait in ms before check for email notifications to send
Web App
The web app (which code is shown in List 2) is at the heart of this project, and allow us to completely manage both the D7S sensor and the email notification system, setting up different receivers.
By connecting to the IP address set in the network configuration of Fishmograph, we will see the login screen that protects the entire system from unauthorized accesses; the first login will use the password previously set during the configuration stage.
After logging in, the web app will automatically send us to the page with the detection history which also includes information on possibly reaching the shut-off and collapse conditions, showing time and date of the signal emitted by the D7S sensor, if that is the case.
By clicking on D7S Readings we can view the detections directly taken from the sensor, divided into the most recent five and the most intense five.
Email Alerts allows us to manage the receiver list for the email notifications. The maximum receiver limit we can insert is 10, this limitation guarantees to not overload Fishino 32’s memory, therefore risking unexpected behaviours.
In the Settings page, we can manage D7S sensor and initialize it, that is acquiring the internal accelerometer offsets in relation to its position, running an auto-diagnostic test or removing the saved earthquake events. The User tab allows editing the login password for the web app, while the General tab allows deleting the detection history we can view on the earthquakes page. In the event of an earthquake taking place while we are connected to the web app, we will see notifications appear in the top section of the page, indicating the event which generated them.
The web app has been developed using HTML, CSS3 and AngularJS, a Javascript that allows creating asynchronous single-page applications, modifying the content of the page shown by the browser without the need for the user to wait for the page to refresh itself. The new content will be loaded “backstage” by the browser and AngularJS will take care to replace the old one with a new one, populating it with the data needed, and possibly downloading the data from the web browser, still in asynchronous mode.
Listing2
//Variable used to handle the web session
long sessionID = -1; //identificator of the web session (only positive number are valid session ID)
bool isUserLogged = false; //if true the user is logged in
//Start a web session
void startSession(FishinoWebServer &web) {
//intialize the session cookie value
long cookieSessionValue = -1;
//read the session cookie
const char *cookieSession = web.getHeaderValue(“Cookie”);
//if the request has send a cookie
if (cookieSession != 0) {
cookieSessionValue = atoi(cookieSession +8);
}
//check if the value of the cookie is different from the session ID we are currently handling
if (cookieSessionValue < 0 || cookieSessionValue != sessionID) {
sessionID = RTC.now().getUnixTime(); //using timestamp for uniqness
//reset isUserLogged session variable
isUserLogged = false;
}
}
//Send the web session cookie
void sendSessionCookie(FishinoWebServer &web) {
//we need to send the “set-cookie” header with the cookie containing the session ID
char cookie[50];
sprintf(cookie, “session=%d; Path=/”, sessionID);
sendHTTPHeader(web, F(“Set-Cookie”), cookie);
}
bool loginHandler(FishinoWebServer &web) {
//start the session handling
startSession(web);
//if the user is already autenticated we do not parse the body of the request
if (isUserLogged) {
sendHTTPStatusCode(web, 204);
// the use is not autenticated and we need to handle the body of the request
} else {
FishinoClient client = web.getClient();
//getting the body of the request
char body[client.available() +1];
int i = 0;
while (client.available() && i < 300) {
body[i++] = (char) client.read();
}
body[i] = 0;
//parsing the request
StaticJsonBuffer<200> jsonBuffer;
JsonObject& request = jsonBuffer.parseObject(body);
//the body of the request is incorrect
if (!request.success() || !request.containsKey(“password”)) {
sendHTTPStatusCode(web, 400);
} else {
//getting the password from the body
const char *password = request[“password”];
//if the password is correct
if (strcmp(password, getUserPassword()) == 0) {
//the login is successful
isUserLogged = true;
//send status code
sendHTTPStatusCode(web, 204);
// the password is incorrect
} else {
sendHTTPStatusCode(web, 401);
}
}
}
//send the session “set-cookie” header
sendSessionCookie(web);
sendHTTPHeader(web, F(“Content-Type”), F(“application/json”));
web.endHeaders();
return true;
}
Web session with fishino
All the online services request to recognize the user and keep a record of their actions, which is essential in the dynamic web where webpage contents are dynamically built by the server respecting the needs of the specific user.
Think about all the websites that ask us to login and show content relevant for us, such as our social profiles or our favorite online store.

It wouldn’t be pleasant to find our credit card charged with the purchase made by a stranger, just because the web server wasn’t able to recognize the user connected in that moment. Fishmograph also needs to recognize the users connected, because it requires a login process before accessing the control section, thus protecting from possible tampering which could compromise the correct functioning of the project.
In order to provide the web server, in our case Fishino 32, with this functionality, we must introduce the concepts of a session ID and web session.
A session ID is just a unique identification code that the server generates and associates to the user currently connected and which allows the server to recompose the user status observing the web session connected to that specific ID. The user, or better, the user’s browser, receives this code from the web server as a cookie along with the HTTP request-response; the browser will take care of keeping it and attaching it to each subsequent request, guaranteeing the correct functioning of the web sessions.
List 2 shows part of Fishmograph firmware, focusing on the sections that directly manage the session.
The login handler function is the handler transmitted to the instance of the FishinoWebServer class (not shown in this code section) managing the requests going to the endpoint /login.
The first function we meet is startSession, which initializes the session, checking if there is a cookie in the request containing the session identification for the user; if there is no cookie, the identification is generated.
For the generation, we use the timestamp taken from the integrated RTC to guarantee an always different identification; of course, we can generate it in any other way, the important thing is to keep it unique. Only if the session has been generated, the only session of rival (isUserLogged) is initialized as false.
Continuing with the code, we can notice the credential retrieval from the body of the request, the accuracy check and the update of the value of the variable isUserLogged.
Finally, the sendSessionCookie function is called, which task is to insert a cookie containing the session identification in the response.
The code shown, however, allows managing just one session, which means that if a user is currently connected and another one connects to the web app, the first one is automatically logged out.
Multi-Session management has not been implemented in order to avoid an excessive sketch workload, because we have to make room for saving the identifications, along with the session rival values, on a microSD memory card.
How Fishino sends emails
Fishmograph uses emails to sends notifications for the events generated by the D7S sensor and makes use of a library called SMTPClient, which simplifies the dialogue between Fishino 32 and the SMTP server used.
The library uses the ESMTP protocol (Extended Simple Mail Transfert Protocol), which is an extension of the SMTP protocol, allowing to authenticate the user and subsequently communicate with all the server requiring authentication, such as Gmail.

In List 3, provided as an example inside the library itself, we can see how to compile an email message in all its sections and send it out. The main thing is making sure to use the correct client because we have to use a client capable of managing a protected connection in order to connect to servers such as Gmail, which use a coded TLS connection.
After the server connection is established, we send the EHLO command, tantamount to HELO in SMTP, but indicating the server that we want to use ESMTP. The content of this command is completely arbitrary, although the protocol would call for communicating the client identity.
After the authentication, using username and password coded in Base64 as previously shown, we insert to the sender email and the receivers’ addresses, regardless of them being CC or BCC.
The message content, preceded by the headers, is inserted after calling the data method, to indicate the beginning of the message to the server.
Listing3
#include <Fishino.h>
#include <SPI.h>
#include <SMTPClient.h>
// DATI DI CONFIGURAZIONE -- ADATTARE ALLA PROPRIA RETE WiFi !!!
#ifndef __MY_NETWORK_H
// inserire qui lo SSID della rete WiFi
#define MY_SSID “”
// inserire qui la PASSWORD della rete WiFi -- Usare “” se la rete non │ protetta
#define MY_PASS “”
// here put required IP address (and maybe gateway and netmask!) of your Fishino
// comment out this lines if you want AUTO IP (dhcp)
// NOTE : if you use auto IP you must find it somehow !
// inserire qui l’IP desiderato ed eventualmente gateway e netmask per il fishino
// commentare le linee sotto se si vuole l’IP automatico
// nota : se si utilizza l’IP automatico, occorre un metodo per trovarlo !
#define IPADDR 192, 168, 1, 251
#define GATEWAY 192, 168, 1, 1
#define NETMASK 255, 255, 255, 0
#endif
//--- SMTP server settings ---
//GMAIL
// You will need a secure client to use Gmail on port 465 because it requires TLS.
// You need also to enable less secure apps from https://myaccount.google.com/lesssecureapps
#define SMTP_SERVER “smtp.gmail.com”
#define SMTP_PORT 465
//SMTP2GO
// You just need a normal client because the connection to server is not secure
//#define SMTP_ADDRESS “mail.smtp2go.com”
//#define SMTP_PORT 2525
//--- SMTP AUTH (must be in base64) ---
#define SMTP_LOGIN “”
#define SMTP_PASSWD “”
// FINE CONFIGURAZIONE //
// define ip address if required
// NOTE : if your network is not of type 255.255.255.0 or your gateway is not xx.xx.xx.1
// you should set also both netmask and gateway
#ifdef IPADDR
IPAddress ip(IPADDR);
#ifdef GATEWAY
IPAddress gw(GATEWAY);
#else
IPAddress gw(ip[0], ip[1], ip[2], 1);
#endif
#ifdef NETMASK
IPAddress nm(NETMASK);
#else
IPAddress nm(255, 255, 255, 0);
#endif
#endif
// Use FishinoSecureClient class to create TLS connection
FishinoSecureClient client;
// Use FishinoClient class to create connection
//FishinoClient client;
void printWifiStatus() {
// print the SSID of the network you’re attached to:
// stampa lo SSID della rete:
Serial.print(“SSID: “);
Serial.println(Fishino.SSID());
// stampa l’indirizzo IP della rete:
IPAddress ip = Fishino.localIP();
Serial.print(“IP Address: “);
Serial.println(ip);
// stampa la potenza del segnale di rete:
long rssi = Fishino.RSSI();
Serial.print(“signal strength (RSSI):”);
Serial.print(rssi);
Serial.println(“ dBm”);
}
void setup() {
// Fishino connection stuff
// Initialize serial and wait for port to open
Serial.begin(115200);
// only necessary for the Leonardo
while (!Serial);
// initializes the SPI module
SPI.begin();
SPI.setClockDivider(SPI_CLOCK_DIV2);
// reset and test the WiFi module
Serial << F(“Reset WiFi module...”);
Fishino.reset();
Serial << F(“OK\n”);
// set the station mode
Fishino.setMode(STATION_MODE);
// Initialize your WiFi connection
Serial << F(“Setting up the Wifi connection\n”);
// tenta la connessione finche non riesce
while(!Fishino.begin(MY_SSID, MY_PASS))
Serial << F(“ERROR CONNECTING TO AP, RETRYING....\n”);
// sets the static IP or starts the DHCP client
#ifdef IPADDR
Fishino.config(ip, gw, nm);
#else
Fishino.staStartDHCP();
#endif
Serial << F(“Waiting for IP..”);
while(Fishino.status() != STATION_GOT_IP)
{
delay(500);
Serial << “.”;
}
Serial << F(“OK\n”);
// prints the connection status on the serial port
printWifiStatus();
//SMTPClient stuff
// Create an SMTP client
SMTPClient smtp(client, SMTP_SERVER, SMTP_PORT);
// Connect to the SMTP server
smtp.connect();
// EHLO command
smtp.ehlo(“friend”);
// AUTH LOGIN command
smtp.authLogin(SMTP_LOGIN, SMTP_PASSWD);
// MAIL FROM command
smtp.mailFrom(“sender@example.com”); // From
// RCPT TO command
smtp.rcptTo(“someone@example.com”); // To
smtp.rcptTo(“someoneelse@example.com”); // To
smtp.rcptTo(“another@example.com”); // CC
smtp.rcptTo(“secret@example.com”); // BCC
// DATA command
smtp.data();
// Setting some headers
smtp.header(“From”, “Some Sender <sender@example.com>”); // From
smtp.header(“To”, “Someone <someone@example.com>, Someone Else <someoneelse@example.com>”);
smtp.header(“CC”, “Another <another@example.com>”);
smtp.header(“Subject”, “Hello there”);
smtp.body(“Email sent from Arduino/ESP8266/Fishino!”);
smtp.finishData();
smtp.quit();
}
void loop() {
}
It is interesting to notice how the CCN receiver is not included inside the headers contained in the message, however, the message will be delivered because it is included in the receivers. Once we
are done inserting the message content, we can use the method finishData to send out the email.

Each command used in this example returns a status code indicating if the operation went successfully or if any errors occurred, allowing us to prematurely interrupt the email sending.
The library also makes a container class available to quickly compile an email, without having to manually handle all the commands with the corresponding status codes; inside the example found in the library, you can also find an example sketch showing its functioning.
Conclusion
Fishmograph is an application example for the D7S earthquake detector, capable of showing its potential and possible uses to protect our electronic devices.
One possible evolution of the project could be to add a relay used to cut off power whenever the sensor detects a danger and subsequently generating a shutoff or collapse signal.
This project was also an opportunity to show the basis of managing a web session and sending out an email from Fishino: these are all concepts you will be able to transfer to your applications, even different from Fishmograph.
From openstore

[…] Fishmograph – Omron’s D7S sensor based seismograph – [Link] […]
[…] Fishmograph – sismógrafo Omron basado en sensores D7S – [Link] […]