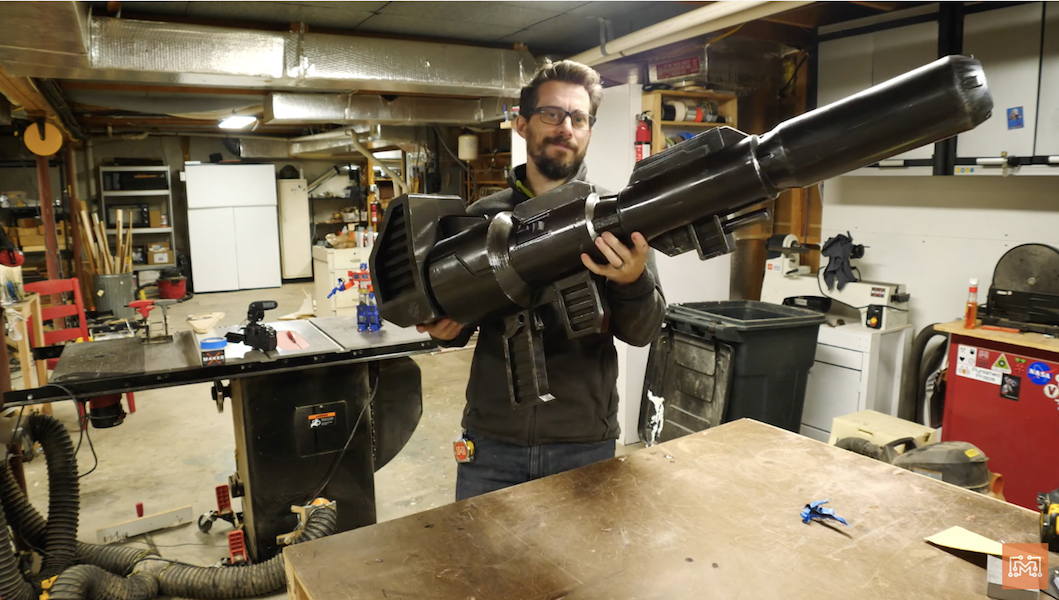

Youtuber Bob Clagett is a huge fan of 80’s toys and movies. Inspired by Transformers he decided to realize his dream: build his own life-sized Optimus Prime ion blaster.
Now, after hours of 3D printing and finishing, he finally has something worthy of that universe.
Inside, sound and lighting effects are controlled by an Arduino, which plays clips from the show and flashes in different patterns via an Adafruit sound board and RGB LED strip.
“I wanted the blaster to play sounds and have lights come out of the barrel so I rigged up an Arduino Nano with an Adafruit sound board and amp that would cycle blaster sounds and lights when a button was pressed. And because there’s always more than meets the eye, I had a separate button that played just Transformers sound clips. To defuse the LED strip when the lights fired, I printed a semi-translucent disc that would stand-off from the sides so that sound could still escape, but the light would be diffused. I decided to mount all of the audio components in the barrel so that the cannon could be taken apart to charge the battery back. If you want to get the code to use for you own projects, it’s on my GitHub.”
Of course it’s an open source project with free code, so you can re-use it to build your personal Blaster or you can modify it as you prefer.
Watch the demonstration video below for further information.
