This post introduces in details one of the latest boards from the Arduino Team: a board that we still didn’t cover that much on the blog. YÚN’s DNA is that of the Arduino family lately open to new requirements and perspectives: Embedded Linux, Ethernet and WiFi with a board that is easy to use and just ready out of the box.
Once we put our hands on the Arduino Yun months ago, we could not resist the temptation to test it immediately to verify the innovative features. In the official presentation releases YÚN was announced as a product which that incorporates the features of a standard Arduino Leonardo, a section with additional hardware, with a separate processor can accommodate a full GNU / Linux release (OpenWRT) that is specifically intended for internet connectivity (OpenWRT is the open source distribution mostly used in routers and WiFi access point).
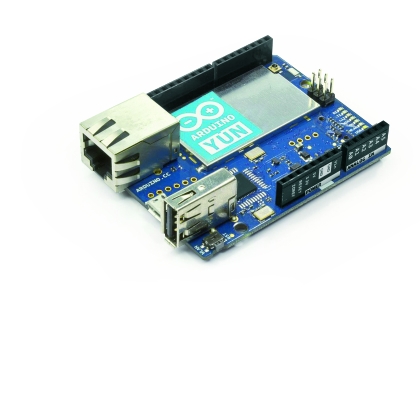
With the packaging in hand just comes the first question: are you that’s a YÚN? The box is of the very same size of that of the Arduino Uno: in fact the card itself is of the very same size of the Arduino Uno. Turning it over in your hands you will see two USB ports, an Ethernet jack, a slot for a micro SDCard, and all the standard connectors to an Arduino. There are also three buttons and a external antenna connector for the WiFi section. All this is surrounded by a good amount of miniaturized electronics on both sides of the PCB.
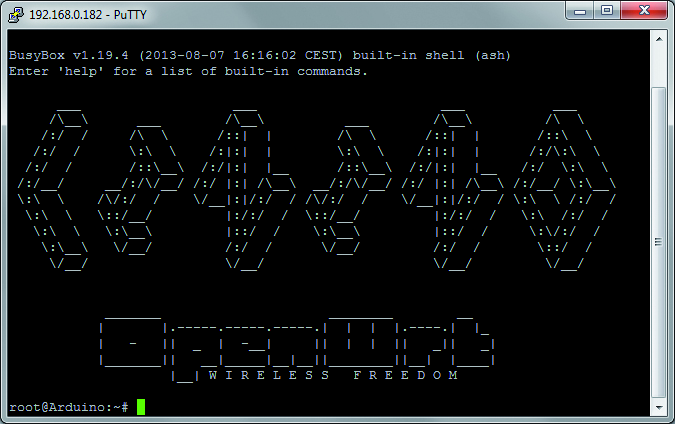
We just connected a network cable to the Ethernet and turned on the Arduino Yun board by powering it by connecting a 5V power supply from a micro USB socket (the one for charging mobile phones) to the micro USB connector in the center of the Yun card. The ON LED glows a beautiful card green and a little later the WAN LED gets yellow.
Open a browser and type the address:
http://arduino.local
(this info is on the Yun “getting started” guide on the Arduino website). Big surprise, we get this page:

Just give the “Arduino” password (root password by default) and you get the following page which shows the configuration of active network interfaces. Yun comes with an installed operating system with pre-configured network interfaces and a running web server with a GNU / Linux configuration webapp.
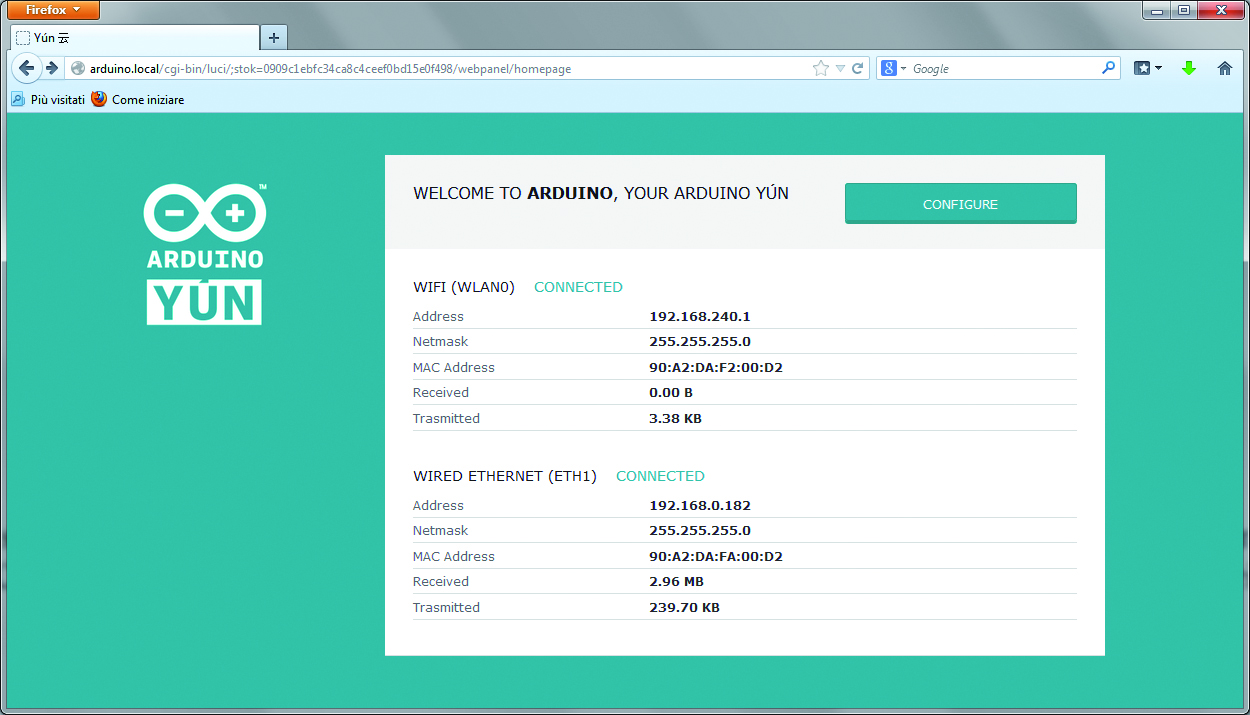
You’ll have noticed that we used arduino.local address to connect to the unit: while IP address is assigned by the DHCP server of our network, the GNU / Linux distribution of Yun comes equipped with an internal DNS server. In the figure, we see the WAN IP address assigned to the board and the WiFi section configuration, (pre-configured as an access point with a static IP).
This means that we can connect to Yun also in WiFi: by connecting to the network with the SSID “Arduino Yun-<board mac address>.“
You don’t need a monitor, a keyboard, a mouse and neither you need a network cable: not bad to make life easier for newbies. But let’s continue browsing: by pressing the “configure” button in the top right of the page you get an additional configuration page with further links, in the top right. First, however, let’s take the chance to configure the correct Time Zone, and select the check box “Open” in the “Rest API Access” (will talk about this later).

Well, click on the link “advanced configuration panel” and you’ll get in a real administration environment. From the top menu, you can access the different sections to manage the GNU/Linux system. The custom Arduino Yun GNU/Linux distribution is called “Linino” and is derived from OpenWRT.
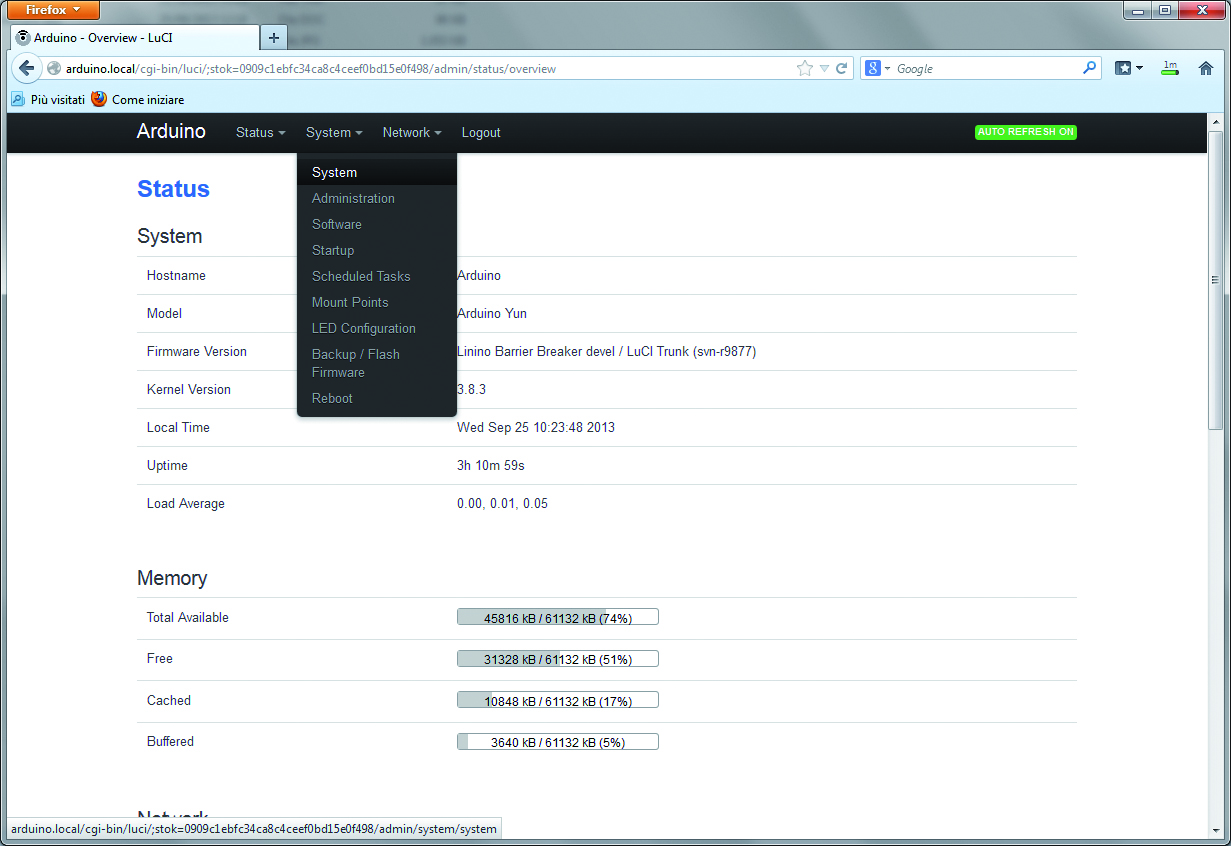
If you ding into the “Network” and “Access” sections in the page by clicking on the “Edit” button and scrolling down the page, there is a section that allows you to configure the WiFi section of the card in the different modes (Access Point, Client, Ad Hoc, etc.). The other configuration sections allow to set security access rules (firewall), Routing, DHCP and DNS: ultimately, this is a true connectivity device that is suitable of a wide range of applications, processing requirements and network configurations. One last test, to connect to the address assigned by DHCP (by means of SSH clients Putty and WinSCP, with “root” user and “arduino” password) shows that the SSH server is up and running “out of the box” as well.
It ‘s now time to stop for a moment and go more in deep in the general characteristics of the Yun.
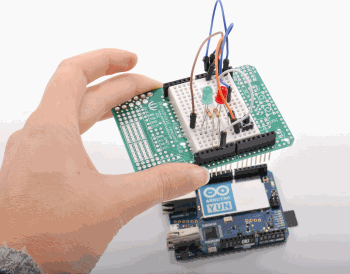
By taking it in hand we notice another really useful feature: the outer sides of the connectors you can find printed references of the individual pins, which allows you to use the card without the need of a wiring diagram.
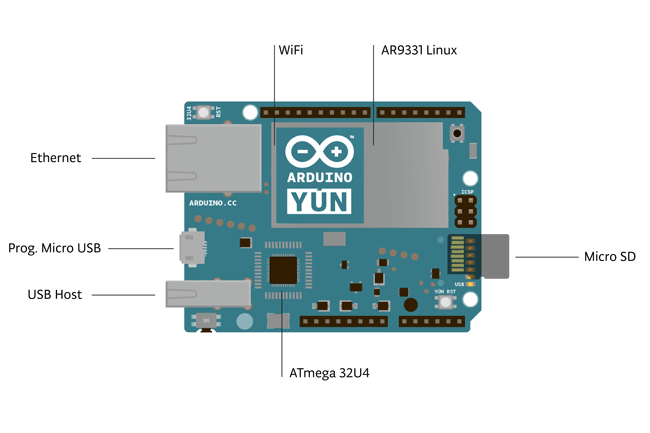
Yun sports a ATMEGA32U4 chip, the same as Arduino Leonardo (16 Mhz clock and 32 KB of RAM, four of which are occupied by the bootloader). As for power supply, there is not a 5V regulator, so it is good to be careful not to feed the card with a higher voltage, otherwise youcan damage the board irremediably especially if you want to power the board using the Vin pin. In this regard, it’s good to know that micro-USB format power outlets usually provide exactly that voltage. The micro-USB port is also used to connect the card to a PC for Arduino programming. But it is also possible to upload the sketch over the internet, directly from the IDE.
The IDE to use, is freely downloadable, (http://arduino.cc/en/Main/Software), you must use 1.5.4 r2 or higher versions. The other difference in behavior, compared to the Leonardo, is the fact that the microcontroller does not reset when you open the IDE serial monitor. Also you can not use the Serial1 interface as it is reserved for the communication with the GNU / Linux section. To reset the microcontroller you can use the “32U4 Reset Button” that is next to the Ethernet connector.
The GNU/Linux Section is managed by the second processor, an Atheros AR9331 400 MHz. Probably the choice was determined by the particular suitability of this SoC to host the OpenWRT distribution (which Linino is derivate from), as well as for its particularly low fuel consumption. The GNU / Linux section comes with an Ethernet connector and a USB-A Host. A slot for a micro SDCard on which is needed to accommodate the “personal” section of the GNU / Linux file system, in order to save the little Nand RAM assigned to the Atheros processor that is also characterized by a very limited number of possible rewrites, approximately 100,000. To do this, just insert a micro SDCard slot, and then create two folders that are automatically recognized and used by the operating system: /arduino and /data.
Actually the operating system automatically mounts all external mass storage device called “sda*” at boot (we’ll see the use of these folders in detail later). In the GNU / Linux section there’s also a WiFi module which is connected with the Atheros AR9331 processor, that in turn provides wireless access to the entire system, with the additional possibility to connect an external antenna.
Let’s look at the reset buttons: we have already seen the classic one that allows the reset of the Atmega32U4 microcontroller. The other two buttons allow you to reset the Atheros AR9331 processor and the WiFi module. Pressing the ” Linino reset button” allows you to reboot the Linino operating system. Clearly all the data in memory will be lost and all the processes will be terminated. The WiFi reset button has a double function: a five second pressure allows you to reset the WiFi module to the factory setting (access point with a static IP 192.168.240.1) and resetting the WiFi module also involves a reboot of Linino. If you press that button for more than 30 seconds, this will instead causes the overall operating system recovery procedure and the original, factory loaded version of the OS will be put in operation. This leaves the freedom to experiment without the fear of being in situations with no way out. As simple as that. Clearly the price could be to lose all configurations and Linino updates.
The board also has the following LEDs:
-
USB – Blue, indicates activity on the USB
-
WLAN (WiFi) – WiFi active
-
POWER – Indicates the presence of power
-
WAN – Indicates the presence of an active Ethernet network connection
-
Pin 13 – Reports pin 13 status – when the board is new it blinks since the Blink program is loaded
-
Serial TX – Indicates transmission activity on the serial port
-
Serial RX – Indicates transmission activity on the serial port
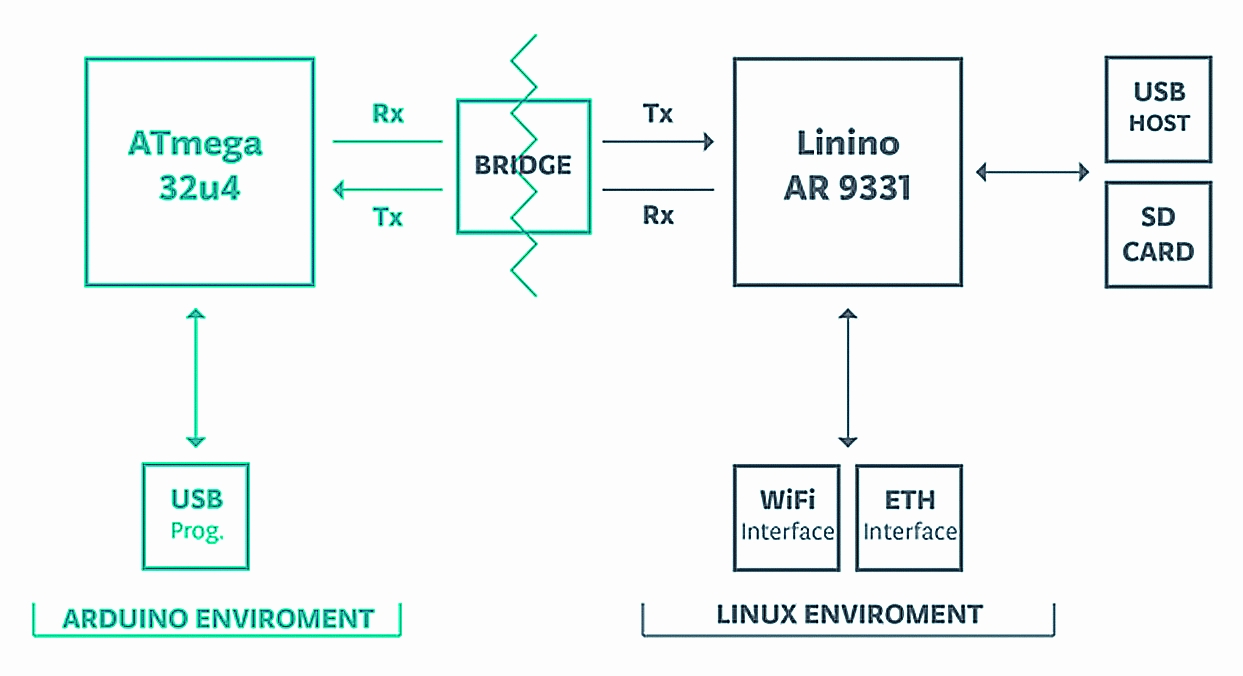
The figure shows the general architecture diagram of the board. The two sections “Arduino” and “Linino” are clearly visible, with the devices assigned to both and the connection “bridge”. This is one what allows the two environments to work together and create an innovative embedded Linux solution to empower connected applications. In the past we presented other connectivity solutions based on an Ethernet shield, WiFi, bluethooth, etc.. but all had to deal with the microcontroller’s limited resources available. It was pretty impossible to manage different users and a complex HTML page, not to mention the management of competitions between web access and management of sensors and I/O peripherals. With this architecture, everything is solved and each section deals with the best of its features. The availability of IDE integrated libraries to handle the communication “bridge” from Arduino do the rest, giving you the ability to develop solutions, even complex, with the usual simplicity and linearity of the Arduino ecosystem.
Let’s to the “Bridge” for a moment. The ATmega 32u4 processors and the Atheros AR9331 are connected via the serial port. On the Arduino side, the “Bridge” library allows you to connect to the Linino environment, using the Serial1 serial port, which can not be used for other purposes. Oversimplifying a bit, the “Bridge” library uses the serial port to send to commands to the Linino console. These commands are used to activate linux processes on the Linino side: these processes act as a bridge with the services and applications of the GNU/Linux environment. Linino instead assigns the serial port to the CLI (Command Line Interface) at boot. In this way, all commands strings sent from the Bridge library are interpreted as shell commands, which activate python programs that are responsible for making the different interface modes available. In this way it is possible to establish communication between the Arduino and the Linino section simulating a remote terminal emulation (Console), as a remote command management shell, as a bridge to read and write files on the Linino SDCard from the Arduino sketch, as a HTTP URLs bridge of communication to handle the uHTTPd (Micro Hypertext Transfer Protocol Daemon) web server requests from inside the Arduino sketch, and more. On the Linino side, several tools are available for use to this way of communication programmatically. We could cite the REST framework that enables interfacing with Arduino I/O pins of via HTTP URL such as:
http://arduino.local/arduino/digital/13/1
which means: bring digital I/O pin 13 to high. Another framework that can be managed with the Bridge library is Spacebrew, a Publish/Subscribe server which allows multiple client devices to communicate with each other in by means of a public or private “coordinator”. Finally, there is the possibility of interfacing Temboo APIs that allow you to communicate with a large amount of “web” service.
Conclusions
In this first, overdue, Arduino Yun board assessment we described it only superficially. Yun lends itself as a testbed, simple and inexpensive sandboxed platform that is ready for you to experiment at the convergence between Arduino and GNU/Linux. The Linino operating system with his OpenWRT heart it’s a good, low cost solution for configuration and network management and also sports some advanced safety features, in both wired and wireless environment. With a handful of Yun cards even complex network configurations can be made.
All the feature we described, actually led to a great level of simplification (in the “Arduino” DNA) which allows both beginners and advanced users, to find immediate satisfaction and interest for this Board that, can be considered complimentary and specialized respect the upcoming Galileo or Arduino 3 and will surely still have fans once the new Arduino products will finally arrive on the market.

[…] Focus on Arduino YÚN: a board for all, that makes life easierPosted 1 week ago […]
[…] the Arduino YUN was presented just recently, already a new board that is compatible with GNU/Linux has been […]
[…] the Arduino YUN was presented just recently, already a new board that is compatible with GNU/Linux has been […]
[…] the Arduino YUN was presented just recently, already a new board that is compatible with GNU/Linux has been […]
[…] the past months we presented the Arduino Yun and Arduino Galileo boards. Today we present you a new board, quite more powerful, but still […]