The Windows Club has recently published a full guide to install Windows 10 IoT Core on Raspberry Pi.
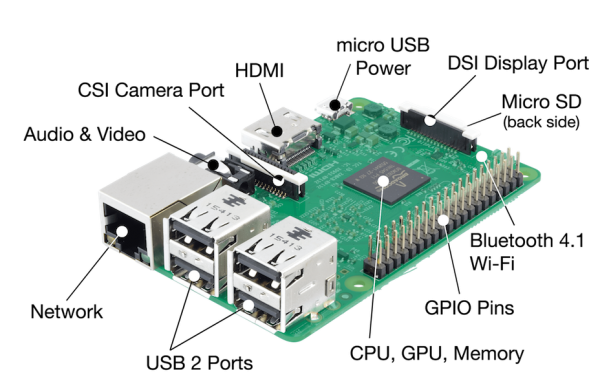
In order to be able to install Windows 10 on your Raspberry Pi SBC and follow the tutorial you will need the following:
– A copy of Windows 10 IoT Core Dashboard – downloadable from the official Microsoft Website located here.
– An input device to select language during installation
– A display to view the proceedings;
– An HDMI cable to connect Raspberry Pi to Display (either computer or TV)
– SD Card to be able to install the OS onto Raspberry Pi
– A shared WiFi connection
Once you have transferred and installed the Windows 10 IoT Core on the blank SD card, you have to connect your mini PC to your monitor and power it up. The Windows Club website explains that as soon as you power up the Raspberry board, it boots and installs Windows IoT Core on itself. Now it is time to install your app to the Raspberry board. You can use your app or use one from the samples available in the Dashboard. Each sample is interconnected to an online help page telling you how to use it.
Visit the WinClub website for the detailed installation’s guide.


[…] Read More […]