When piloting a vehicle remotely, it’s only natural to tilt your controller one way or the other to help guide it in the right direction. While usually this has no effect whatsoever, YouTuber Electronoobs decided to take this concept and run with it, creating a remote control transmitter that responds to an onboard MPU-6050 inertial measurement unit.
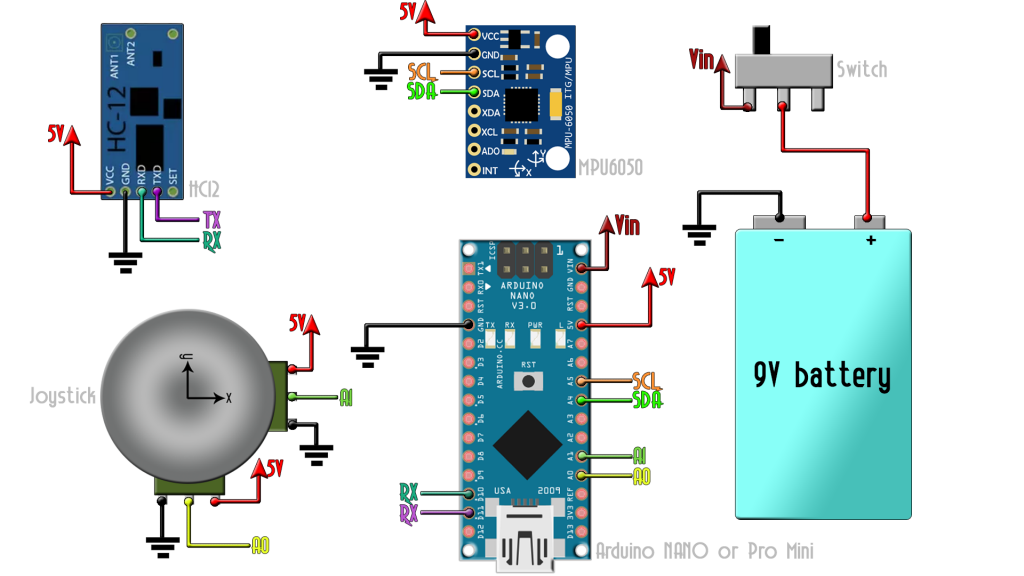
The radio transmitter is simple. In the middle we haev the MPU6050 gyro module so we could detect the angle of the controller. To control everything we have the Arduino NANO and as a supply, I’ll use a 9V battery connected to a sliding switch so we could turn the controller ON/OFF. I also have a Joystick, but we won’t use that in this first part of the tutorial, we will add 2 more channels later with that joystick. Finally, to send the data, i’ll use the HC12 radio mdoule that uses a serial UART communication. It seems to have a better range than the NRF24 mdoules.
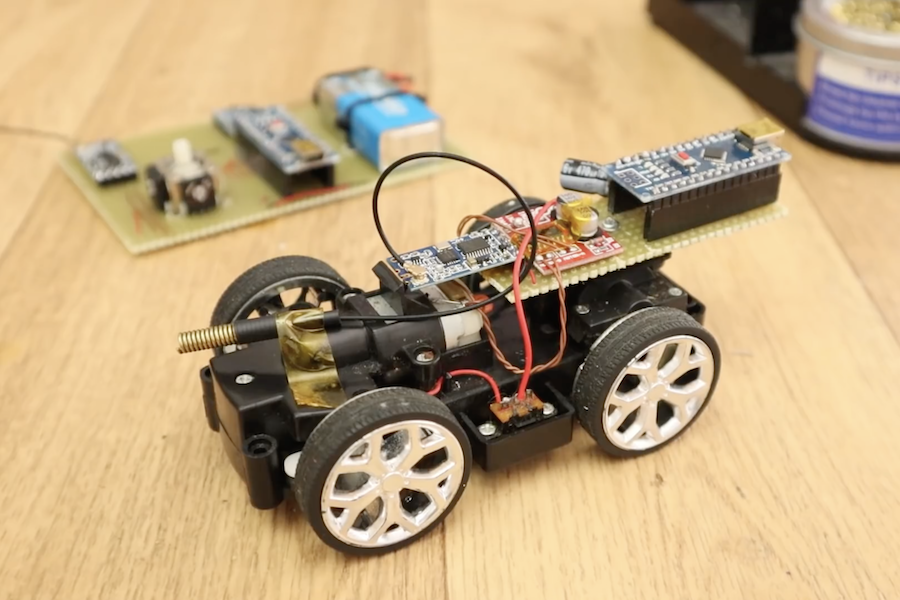
The transmitter’s Arduino Nano takes movement data, and sends the corresponding signals to a custom receiver board on the RC car via a pair of HC-12 wireless modules. A second Arduino mounted in the car then commands the vehicle’s DC motors with the help of an H-bridge.
All the code ed intructions to build it are available here. Let see how it works in the video below.
