If you enjoy flying quadcopters, for sure you’ll appreciate this project. Andi2345 has shared the guidelines to build a drone that streams 3D video and thanks to goggles you can feel like you are actually in the cockpit.
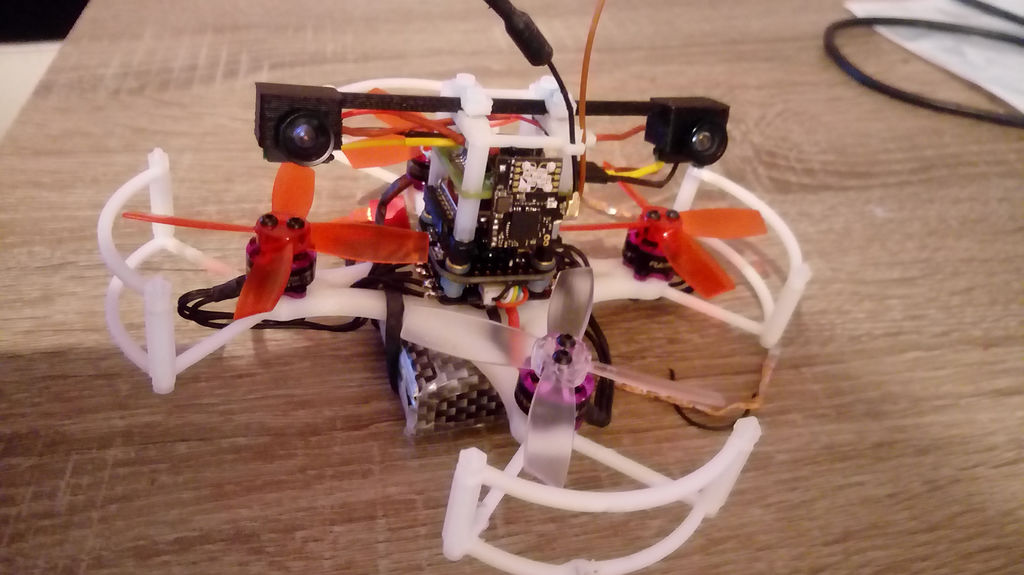
This small and lowcost drone is perfect for indoor exploring. The quadcopter uses two cameras kept in sync with a sync separator IC and a microcontroller, while an analog switch intersperses the frames.
All cameras on the market use a FPGA for making the 3d picture. But I wanted to keep it cheap and easy. I was not sure if it will work but I tried to use two Sync Separator ICs, a Micro controller to manage the syncing and a analog switch IC to switch between the cameras. The biggest problem is to get the cameras synchronized but it is possible to do that with the controller. The result is pretty good.
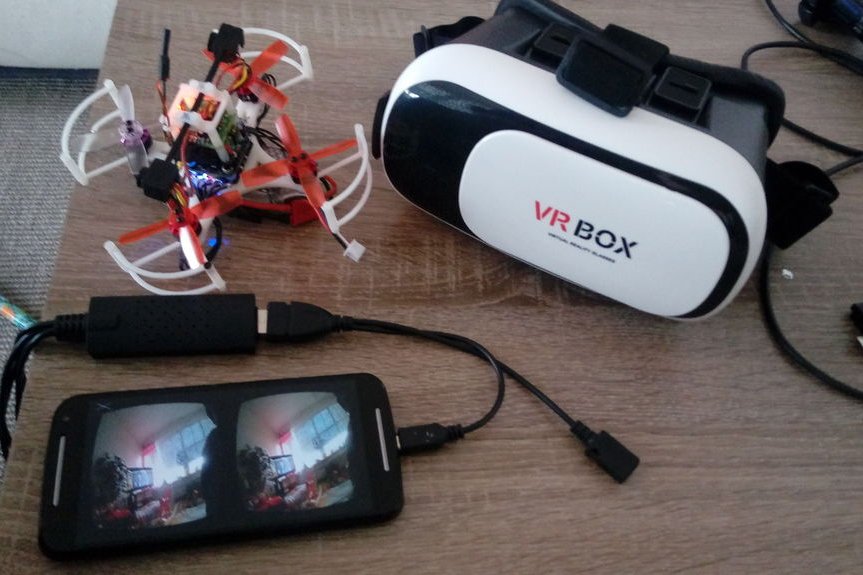
On the viewing side, a USB frame grabber and a Raspberry Pi splits the images again. At first, the system used an LCD screen married with a Google Cardboard-style goggle, but eventually, this became a custom Android application.
Another problem were the 3d goggles. Normally you need special 3d goggles which are pretty expensive. I tried a few things, but I was not able to solve it just with electronics. So I decided to use a USB video grabber and a raspberry Pi with google cardboard. This worked pretty well. But it was not very nice to put the screen into the cardboard and have all the electronics around. So I started to write an android app. In the end I had a complete 3d FPV system for android for less than 70 Euro.
The two cameras work best if you can hack them to use the same clock. If you don’t, then one image may appear to roll. This might be less disturbing if you rotate the cameras so that the roll goes right to left instead of up and down. The system introduces about 100 ms of delay which isn’t perfect but is workable.
