

Robots provided with autonomous operation capabilities and, particularly, those sporting sense organs similar to the human ones, have always tickled the fancy of science fiction writers and screenwriters.
As always happens, from a certain point in history, even official science has started to deal with the subject, at first with the so-called “strong theses”, whose objective was to reproduce, to substitute, the capabilities that are typical of humans.
Once the dimensions and the problems connected to the theme had been understood, the researches oriented themselves towards more practical objectives, and that could allow technically feasible solutions to be thought of. Currently, a variety of applications has been created, finding wide use in many industrial and service sectors.
For what regards reading barcodes, technology went from the laser scan of a simple sequence of black and white vertical bars, to the interpretation of those that are known as QR Codes (Quick Response Code) by means of a video camera.
Other applications that are widely spread can be found in firms processing or packaging food, and in the gathering of agricultural products, or in the automotive and electronic production.
As with many of the projects that we showed you in the past, focused on Raspberry Pi, even the ones that we will present imply the integration of different disciplines and technologies.
A vision system, in fact, made of many different integrated technologies, such as optics, electronics, computer science, communication systems and, why not, mechanics.
As a start, let’s give a short overview of the scenario associated with the computerized vision. The themes that we want to deal with require, in different forms, the elaboration and interpretation of the content of the images, so to extract from it the useful information to pilot the automatic and semiautomatic decision-making processes.
Let’s give then a first subdivision, generally speaking, about the possible objectives or problems that concern the artificial vision, ordered by complexity:
- Reading – Image processing to verify if modifications happened among different frames, in the area framed as a whole or in a single part. This technology has been widely used in the integrated DVRs of the surveillance systems, that have one or more cameras framing sensible areas where one may want to verify if break-ins happen, and in that case one wants to prove the break-in itself, by recording the images for the whole duration of the event. The following examination, made by an appointed operator, so to allow to determine what and who caused the break-in, and how it happened.
- Recognition – Image processing has the objective to recognize the shapes belonging to certain classes. E.g.: this is the case of objects with a circular or rectangular shape, or characterized by closed outlines, or even areas of a certain colour, or that, given their shape, could be traced back to a certain known class, like a face of a part of it, such as the eyes or the nose.
- Identification – This concerns a further sophistication of the previous processings, that allows to “identify” the presence of a specific instance of a form belonging to a known class. Going back to the faces example: after having determined that a certain shape within the image is a face, an attempt tries then to determine if the face is known or that of a person not belonging to the set of known faces.
- Reconstruction – This kind of image processing starts from two or more images of the same object, taken from different points of view, so to generate a complex 3D surface of the object itself. The main difficulty of this kind of processing lies in finding and joining the common dots, coming from different images, and forming the object.
Among the influencing conditions, it is worth remembering lighting sources. Usually, the scene is lighted by natural or artificial light sources, simulating the conditions for the vision of the human eye. The additional opportunities are given by the chance to use infrared-sensing videocameras that allow, by lighting the scene with infrared light, to create night vision systems, or to record radiations emitted depending on the temperatures found in the viewing area. This way, it is possible to acquire and process images, even in fields that are not suitable for the human sight.
Whatever is the configuration of the vision system adopted, we will face an architecture integrating the following components:
- videocameras and optics
- lighting system
- the object and the scene to be examined
- the image acquisition and processing system
- the man-machine interfaces
- the interfaces for the external environment
The system, consisting in a videocamera and optics to “capture” the image, thanks to a sensor (CMOS or CCD), is made up by one or more photodetector matrices (monochromatic cameras, or using more colors) and provides a format that can be understood by the processing system.
This way, the captured images can be processed by conveniently arranged software solutions, that are capable of “reading” the representation format of the images, and to “extract” the information needed so to locate their characteristics and recognize their aspects, e.g.: outlines, corners, shapes, structures, in order to perform checks and verifications for which the system has been conceived.


On the basis of the results coming from processing, the system might take decisions about the operations to execute. As for the experiments and the small applications that we will make with Raspberry Pi, we shall use Camera Pi, a videocamera purposely projected to be used with Raspberry Pi. It doesn’t use the USB connection, as common webcams do, but it is directly plugged in the CSI connector found on Raspberry Pi. The videocamera is available in two versions, the former is sensitive to the daylight, the second one, without IR filter, can be used for night vision and thermal images capture.
The reasons that made us choose Camera Pi, as opposed to a common webcam, are the high resolution, up to 5MP (2592X1944 pixels) for the photos and 1080p30 for the videos; the availability of a management software, specially projected for Camera Pi, that is capable to manage the peripheral as a real camera for photos and videos, with even controls and special effects. The dimensions of the videocamera are 25mm x 20mm x 9mm. By standard 1080p30, we mean the ability to take videos with a resolution of 1080 vertical lines with a refresh of 30 frames per second. Horizontal resolution has 1920 pixels.
Other video formats are supported as well: they are the HD 720p60 video format with a resolution of 1280 pixels in width and 720 pixels in height, and 60 frames per second; and also the VGA 640x480p60/90 video format.
Camera Pi Installation
The basic installation of Camera Pi consists of two phases, the hardware installation and the software configuration for the basic operations. Let’s start with the hardware installation. The micro camera has a flat flexible cable with 15 pins, that will be plugged to the CSI (Camera Serial Interface) connector. The CSI connector is placed between the LAN and the HDMI ports. As you can see from the scheme in Fig. 1, the CSI interface calculates two data lines, a clock line, a control interface that is compatible with the I2C standard and the two powering lines, being 3,3V and GND.

The CIS interface, for the communication between the videocamera and Raspberry PI, is a unidirectional differential serial interface, with data signal lines and clock lines, in accordance to the standards of the MIPI Alliance Standard for D-PHY interfaces.

Figure illustrates the connection between the Transmitter and Receiver in CSI-2 standard. Aside from Camera Pi, the typical usage of this connection regards the internal connection of videocameras for smartphones and mobile devices, in general. The control interface of the system is a bidirectional interface, based on the I2C standard.

To physically install Camera PI on Raspberry Pi you just need to plug in the flat cable in the CSI-2 connector that can be found between the Ethernet and the HDMI connectors. When inserting the connector, carefully, do verify that the silver terminals are directed towards the HDMI connector and the blue back, consequently, is directed towards the Ethernet connector.
For this kind of experience, it is better to use Raspberry Pi as a “classic” PC, with a monitor (a television with HDMI port will be fine), mouse and keyboard. Let’s not forget about the connection to the Internet.
For the first configurations, we may try to connect ourselves remotely, by using the SSH (Secure Shell) protocol. After further verification (did you remove the protection from the lens?), you may power Raspberry Pi and wait for the boot. Let’s start the configuration. After opening a terminal window, we may login with the user “root”. I know this is a bad habit in the GNU/Linux environment, but since we’re talking about Raspberry Pi, we won’t be able to cause too much harm. In the worst of cases, we will have to start again. At the prompt, we shall update the operating system configuration, by typing:
apt-get update
apt-get upgrade
Once done, we shall open the configuration tool of Raspbian, by typing:
raspi-config
Scroll the menu entries, until you light the “Camera” entry.

Press return and, in the next page, select the “Enable” entry with the “Tab” button.
Once back to the main menu, select “Finish”. You will be asked if you want to reboot Raspberri Pi. Select “Yes” and wait for the board to reboot.
At this stage we can make some experiments with Camera Pi, by using the “native” controls for the management of the command line. The controls we’re talking about are “raspistill” and “raspistillyuv”, to capture and memorize single frames; and “raspivid” to capture and memorize the video sequences.
In association to each command we find a rich endowment of parameters that we may divide in two categories. The first category, common to all controls, allows to configure the videocamera, for example by setting saturation, contrast and the type of exposure; while the second category allows to parameterize the running of the single controls, such as the interval between single shots, the duration of a video and where to memorize the result of the operations.


Let’s see some practical examples about how to use these controls. At first, we should choose if to use the “Preview” function or not: it allows us to see a screen preview of the images processed by the controls. If so, we shall use Raspberry Pi as a PC, with video, keyboard and mouse being connected, and operate directly from the graphic interface of the operating system. If not, we might as well operate in remote terminal mode, by using the SSH communication protocol, with the tools Putty and WINScp. Let’s see some examples of controls to take photograms and to record footage.
How to Take shots with Camera Pi
The command to take photograms is:
raspistill
followed by the parameters and the configurations that you find listed in the Tables. The combination of these parameters allows to use Camera Pi as a veritable camera, and of good quality. You may set the exposure and focus values, and a considerable number of effects. You may also decide to visualize the screen image and/or save it on a file. The easiest command when taking a photo and archiving it in a file in JPEG format is:
raspistill -o foto001.jpg
This command allows to save a photogram after 2 seconds of “Preview” (the interval is specified in milliseconds).
raspistill -t 2000 -o foto001.jpg
Saves a photogram with reduced dimensions and resolution.
raspistill -t 2000 -o image.jpg -w 640 -h 480
Saves a low quality photogram to save space.
raspistill -t 2000 -o image.jpg -q 5
Place the “Preview” window on screen at the coordinates 100, 100, with dimensions 300 by 200 pixels.
raspistill -t 2000 -o image.jpg –p 100,100,300,200
Disable the “Preview” window
raspistill -t 2000 -o image.jpg -n
Activate the embossing effect on the acquired photogram
raspistill -t 2000 -o image.jpg -ifx emboss
Acquires images at regular intervals, such as one every 10 seconds, for a duration of 10 minutes (600000ms). They are then memorized as files with progressive names like foto_numero_1.jpg, foto_numero_2.jpg, etc.
raspistill -t 600000 -tl 10000 –o foto _ numero _%d.jpg
Have fun experimenting
How to record videos with Camera Pi
The parameters for the image settings and for the “Preview” are the same available for the acquisition of the photos. The predefined dimensions of the video images are 1920x1080pixels. To record a 5 seconds video with the predefined dimensions (1080p309):
raspivid -t 5000 -o video.h264
To record a 5 seconds video with a predefined band (3.5Mbits/s):
raspivid -t 5000 -o video.h264 -b 3500000
To record a 5 seconds video, and setting the number of frames per second (5fps)
raspivid -t 5000 -o video.h264 -f 5
To record a 5 seconds video, saving it as a file:
raspivid -t 5000 -o – > mio_file.h264
How to use Camera Pi by means of Python programs
Obviously, the controls from terminal window do not represent the only possibility to use Camera Pi. Everything that can be executed by command line can be managed by a program, so to manage the videocamera, for example, by means of a web interface; or the acquisition and filing of images and videos can be automated. And not only that. The stream of images from the videocamera can be directed towards other management software products, to process the acquired images. To manage the videocamera from Python programs, we need to install a management package, created by Dave Jones. Since it’s contained in the Raspbian distribution, we can install it by means of commands that should be familiar by now.
apt-get update
apt-get install python-picamera
The package provides many functionalities, but for the moment we’ll be content to repeat from the program the same configurations that we tried before by means of the command line. The program of Listing 1 allows to acquire a photogram after a delay of 2 seconds, and then to save it as a file. The camera.start_preview() methods are used to start a “Preview” phase and, after two seconds, with the camera.capture method, the photogram’s acquisition and the save of the file are executed.
import time

import picamera


with picamera.PiCamera() as camera:

   camera.resolution = (1024, 768)

   camera.start_preview()

   camera.image_effect = none

   # Acquisition delay

   time.sleep(10)

   #camera.capture('foto.jpg')

   camera.image_effect = 'sketch'

   time.sleep(10)

   camera.image_effect = 'emboss'

   time.sleep(10)

   camera.image_effect = 'negative'

   time.sleep(10)
This program allows to acquire a 60 seconds video in 640 x 480 pixels format:
import picamera


with picamera.PiCamera() as camera:

   camera.resolution = (640, 480)

   camera.start_preview()

   camera.start_recording('video.h264')

   camera.wait_recording(60)

   camera.stop_recording()

   camera.stop_preview()
Other functionalities are possible: to divide the recording of a video into multiple files, to acquire single frames while recording a video, to start a rolling recording, etc. All of the options that we presented in this article will be essential for the next ones, where we shall present the first possibilities for image processing. During this activity it is important to be able to manage the parameters to acquire the image to be processed, such as lighting, focus, format, resolution, balancing, color or black and white (or both). All these characteristics are well implemented in the Camera Pi management software, and we will try to make the most of it. For the moment, have fun experimenting with the infinite choice of available options.

[…] Camera Pi – How Raspberry Pi can see […]
[…] For the full post about how to install the Pi camera, how to take an image, how to capture video, or how to operate the camera features with Python check this tutorial. […]
[…] Camera Pi – How Raspberry Pi can see – From Open Electronics: […]
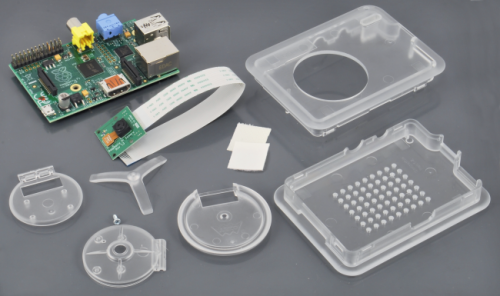
What enclosure is that?
This one https://store.open-electronics.org/index.php?_route_=Linux_Embedded/Raspberry_Camera:Case_Transparent
Which case is this? Where can i buy one from?
https://store.open-electronics.org/index.php?_route_=Linux_Embedded/Raspberry_Camera:Case_Transparent