With this project we’ll show a practical application of our Fishino board that allows a very simple and cheap way to control remote appliances as lamps, heaters, climatizers, alarms, etc.
The peculiarity of our system is that it doesn’t need any external support server nor special network interface boards, but just a Fishino UNO board and possibly one or more relay boards to drive connected loads. This application which can’t be done with a simple Arduino, even not if provided with a common WiFi or Ethernet shield, has been made possible by Fishino’s capability to handle secure connections with HTTPS protocol, which is usually available on more expensive boards; to stay into Arduino world, now at least a YUN board is needed to achieve same purpose, and with a more complex software.
There are many possibilities for the remote control of electric appliances, each with own Pro and Cons.

Let’s see an incomplete list of them:
- Control by SMS – Advantages:
- Receiver can be portable and independent of network infrastructures
- Fast – commands are executed almost instantly
- Can be controlled from any cell phone, even from older ones
- Practically unlimited rangeCaveats:
- A SIM card is needed on controlled board, which usually has an expiration time
- It needs a GSM board, not very cheap
- It needs GSM network coverage, not everywhere available
- Radio control – Advantages:
- Receiver can be portable and independent of network infrastructures
- Fast – commands are executed almost instantly
- Very chealCaveats:
- Very limited range
- Range depends on obstacles between sender and receiver
- Remote control over internet – Advantages:
- Can be made portabled at the price of a GPRS board
- Can be controlled by any PC or recent cell phone
- Quite cheap if you’ve a network infrastructure in place
- Can be made bidirectional with no costCaveats:
- A network infrasctructure or a GPRS board is needed, which can be expensive
- Stability depends on network conditions
- Response times can be very variable
- Often it needs complicated boards and/or support external PC
- Usually a public IP or a way to bypass this limitation is needed,
- Security problems are always possible
With this project we aimed to join the advantages of control by internet removing some of its caveats, using a well-known public service: Twitter.
In practice, the applicances are controlled by a simple Tweet in a given format, from a given user (or more users, with some small changes in software).
With this approach we solve the following caveats of internet control :
- Connection stability. On network failures the command is stored by Twitter network and executed when network goes up again.
- The receiver is quite simple, both on hardware and software side.
- No public IP is needed, nor an intermediate support server
- Security is granted by Twitter infrastructure, which operates over HTTPS protocol.
Al usual also this method has some caveats, which are the non-immediate actuation (tweet propagation times are variable from some seconds up to a couple of tenths of seconds) and some limitations (easily solvable) on duplicates tweets.
Let’s see first the usage, and then the application description.
Appliances are controlled sending a Tweet with following format :
#hashtag port ON/OFF
where ‘#hashtag‘ is a customizable hashtag that can be changed inside the software (in our case we adopted #fishino), ‘port‘ is a Fishino digital port number (more about it later) and ‘ON‘ or ‘OFF‘ are the commands to turn on or off the digital output.
Example:
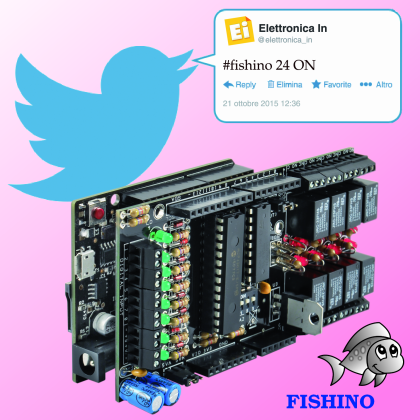
#fishino 24 ON Turn output 24 on
#fishino 10 OFF Turn output 10 off
As above forementioned, there is a variable lapse of time from tweet message and command execution which is usually between 5 and 20 seconds, depending on Twitter network status.
The other caveat is the impossibility to send duplicated tweets in short time; for example:
#fishino 24 ON Turn output 24 on
#fishino 24 OFF Turn output 24 off
#fishino 24 ON Turn output 24 on
Third tweet is rejected by Twitter because is a duplicate of first one in too short time.
The problem is solvet quite simply by adding some random text character after ON word:
#fishino 24 ON 123456 Turn output 24 on
Additional random chars (123456) are simply discarded by receiver.
How it works
Let’s start from sended Tweets, which is stored and propagated into Twitter network. Anybody can see, receive and search for the tweet from everywhere.
Using a cell phone or a PC it’s possible to search it, for example, using the sender and the hashtag as query strings:

Search results are something like following picture:

As you can see, matching Tweets are shown, from most recent one.
Let’a analyze more in detail the single tweet; every message has:
- a sender (@OpenElectronics)
- zero o more hashtags (#fishino)
- a text message, including the hashtags and other text
- a timestamp, showing send date and time
- it can embed references to other people, images, urls, etc.
In our application the important fields are the sender, used to allow or deny the access, the hashtags, used to separate normal tweets from commands, the text, which contains the appliance command, and finally the timestamp, which is used to separate already executed commands from new ones.
We can’t of course execute such a search with a PC to control our appliances; we need something more “machine usable” way.
Twitter API (Application Programming Interfaces) comes in help allowing to execute, among others, search on twitter network in a simple way.
Twitter API
The API are quite large, and allows to do almost all operations on twitter network, as searches and sending of tweets.
In our controller we’re interested in a small subseto of the API, the search APIs.
API usage is quite uniform and, once the usage of a small subset is understood, the extension of the whole APIs is straightforward.
The biggest problem (and security advantage!), which usually makes it impossible to use the API from embedded controllers is the secure protocol used by API.
Tweeter uses, to strenghten the system security, these 2 ways :
- connection to the API’s server MUST been done over HTTPS protocol
- API’s user MUST authenticate himself with one of the methods that we’ll see on next paragraphs
The second requirement is easy enough to meet, but for the first a system able to make secure connections is needed.
This implies that APIs can’t be used with Arduino’s Ethernet/WiFi shields, for example, which operates only on unsecured protocols.
Fishino is able to execute an HTTPS connection to time.
Let’s see in detail a typical https request to Twitter API:
GET /1.1/search/tweets.json?count=1&q=%23fishino+from%3Amdelfede&result_type=recent&max_id=647068135569387520&since_id=646038066440896517 HTTP/1.1
Host: api.twitter.com
User-Agent: Fishino Twitter Client
Authorization: Bearer AAAAAAAAAAAAAAAAAAAAxxxxxx
First row is the true request :
- GET /1.1/search/tweets.json?
is the request on search APIs - count=1
is maximum number of requested results; we want a tweet per request - q=%23fishino+from%3Amdelfede
we search for fishino hashtag (%23, #) coming from user (%3A,@) mdelfede - result_type=recent
we want results sorted by timestamp and not by popularity - max_id=647068135569387520
IDs are timing sequence numbers embedded in each tweet. In this case we want a tweet not newer than the supplied id - since_id=646038066440896517
We wants only tweets newers than supplied id - HTTP/1.1
closes HTTP query
Second and third rows are the address hosting the APIs (api.twitter.com) and the application which is executing the query (Fishino Twitter Client); the latter can be almost any string and is uset just to identify the application using the API.
Next row is quite important; it’s used to authenticate the request on twitter network :
Authorization: Bearer AAAAAAAAAAAAAAAAAAAAxxxx
Twitter network, as forementioned, uses 2 methods to strenghten the security : HTTPS protocol (which avoids attacks like “man in the middle”) and some authentication keys.
Latter can be of 2 kinds : personal o di application-only.
With the formers the access is done as a twitter user, and act exactly as him; it’s possible, for example, send tweets as if they were sent by an human over a PC.
Secon kind of authentication is more limited, being tied to the application, so partially anonymous. You can’t send tweets with it, but you’re limited to some kinds of operations like tweet searchs.
In our application we used the latter method, because it’s less rate limited than the forst one and allows more requests per our and, more important, the requests are separated from user-authenticated ones.
The limits are actually of 180 requests every 15 minutes, both for usage as an user and as an application. So, if we execute 180 requests in 15 minutes as an application we still have the same amount of them available as an user.
Passing these limits means account suspensions, so it’s better to not exetuce too many requests in short time; 180 requests every15 minutes means an interval of 5 seconds between them.
How to get a ‘Bearer’ authorization key
Here we explain how to create a Twitter application and get it’s auth key.
We need of course to have a Twitter account and open following link :
https://apps.twitter.com/
You’ll get the following screen :

In this case we see an already registered application (FishinoBreakTheSafe) and the ‘Create New App‘ button. Pushing it you’ll get following screen :

Now some input is needed :
-
Applicaztion name (Name); in this case FishinoTestApp
-
Application description (Description); in this case “Prova di applicazione Twitter per Fishino“
-
Website : a website which should show application’s details; mandatory, but can be a simple placeholder. In this case www.fishino.it
-
Callback URL : not needed here (leave empty)
At page bottom you find the usual service agreement checkbox and the create button (Create your Twitter application) :

Pushing it you’ll get following page :

Application has been created and the system shows (obscurated here) the ‘consumer API key’, which is one of the needed keys.
As we want to use the ‘Bearer token‘, the one needed in Application only mode, we need one more step; click on above tab ‘Keys and access tokens‘; you’ll get following screen :

You’re told that the application has not still been autorized (below ‘Your Access Token‘). Pushing the ‘Create my access token‘ button below you get :

Below the text ‘Your Access Token‘ you’ll see now the 2 keys needed for application usage in user-mode . Last step needed, to get the Application-only key, which is the one we’ll use in our application, it’s usually the more complicated, because on API documentations the way to get it is explained but no simple page is given to do it. So, we have made an http page at the following address
which allows to get the ‘bearer token‘ quite easily:

It’s enough to enter the ‘consumer_key‘ and the ‘consumer_secret‘ from application’s page, and push the ‘Generate token‘ button to get the key ready to be copied and pasted in our sketch. A last note: the key is shown in 2 lines because of limited space, but it is a single line key.
The sketch
Let’s see the sketch, now, starting from configuration data on file’s beginning part, so the impatients can test it quickly :
//////////////////////////////////////////////////////////////////////////////////////////

// CONFIGURATION DATA -- ADAPT TO YOUR NETWORK !!!

//////////////////////////////////////////////////////////////////////////////////////////

// CONFIGURATION DATA -- ADAPT TO YOUR NETWORK !!!

// here pur SSID of your network

#define MY_SSID "CASA"

// here put PASSWORD of your network. Use "" if none

#define MY_PASS "unapassword"

// here put required IP address of your Fishino

// comment out this line if you want AUTO IP (dhcp)

// NOTE : if you use auto IP you must find it somehow !

 #define IPADDR 192, 168, 1, 251

// here put your application Bearer authorization key

// see https://dev.twitter.com/oauth/application-only for details

#define BEARER "AAAAAAAAAAAAAAAAAAAAA.........."

// here put your Twitter user name; if empty the application will react to ANY user

#define TWITTER_USER "pippo"

// here put twitter hashtag needed to trigger the event (without the # char!)

#define TWITTER_HASHTAG "fishino"

// here put the delay in milliseconds between requsts

// there is a limit of about 180 requests every 15 minutes, so don't put a too short time here

#define REQUESTS_INTERVAL 5000
Settings are quite simple; if you’ve already run some Fishino application you’ll notice that the oprions are almost the same for all of them; in detail, near the and of configuration block you’ll see the part needed for Twitter, ad the Bearer Token which we discussed on former paragraphs (BEARER), the twitter user name (TWITTER_USER) from which the command tweets must be made, the activation l’hashtag (TWITTER_HASHTAG), to insert WITHOUT the ‘#‘ character and finally the time interval between 2 requests. About latter parameter, as we explained on former sections, Twitter has some limits on requests number that can be done in some time; passing these limits means the applocation block, sometimes temporarly, sometimes forever. Now the limit is of 180 requests every 15 minutes, so about a request each 5 seconds. We suggest to not use a value less than the suggested 5000 milliseconds if not for short tests.
Sketch description
We’ll skip the initialization part, almost identical for each Fishino application; if you’re interested on it we suggest to look at FishinoHomeAuto description. We limit the description to the 2 most interesting parts, the Twitter API’s usage and the optional IO expansion.
About the APIs, we notice the first difference from other applications :
// The web secure client used to access twitter API

FishinoSecureClient client;
We use the FishinoSecureClient instead of FishinoClient. This client is used to make HTTPS connections.
API’s connection is done by aid of following code chunk :
if (!client.connected() && !client.available())

{

Serial.println("\nStarting connection to server...");

if(client.connect("api.twitter.com", 443))

{

Serial.println("connected to server");

// run the query looking from given hashtag and user

doQuery(client, "%23" TWITTER_HASHTAG);

}

}
We check if client is still connected from preceding loop and/or if it has still data to be processed, as data is maintained inside a buffer even after the client get closed. If not, we open the connection to the site api.twitter.com on port 443 which is the one used for https connections.
If connections is successful we send the request by aid of the doQuery() function, whic has as parameters the client and the given hashtag.
This function just sends the data to Twitter API server :
// run a query on twitter

void doQuery(FishinoSecureClient &client, const char *query)

{

// if walkback is finished (nextID == -1) we reset sinceID to next found maximum ID

// otherwise we let it as it is and continue the walk back

if(nextID == (uint64_t)-1)

sinceID = maxID;

client.print("GET /1.1/search/tweets.json?count=1&q=");

client.print(query);

if(strlen(TWITTER_USER))

{

client.print("+from%3A");

client.print(TWITTER_USER);

}

client.print("&result_type=recent");

if(nextID != (uint64_t)-1)

{

client.print("&max_id=");

client << nextID;

}

client.print("&since_id=");

client << sinceID;

client.println(" HTTP/1.1");

client.println("Host: api.twitter.com");

client.println("User-Agent: Fishino Twitter Client");

// send auth key to server

client.println("Authorization: Bearer " BEARER);

client.println();

// reset nextID - it will be filled by parser if more results are pending

nextID = -1;

}
The only peculiarity of this function is the usage of since_id and max_id fields to limit the search between 2 timestamps.
Because of Fishino’s limited speed and memory we decided to process a single tweet per request, which is the latter included between the 2 given limits. Playing with those IDs it’s possoble to walk back asking for former tweets up to the beginning of them. Once the search has ended we reset since_id field to get, on following requests, just the most recent tweets.
Once the request has been sent, we must analyze the received data. Twitter APIs answer with data in JSON format of variable sizes, which can be quite big. Because of limited Fishino’s resources we can’t simply store and process the whole data; we need so a way to parse it while it is received. To fulfill this requirement we developed a complete JSON parsing library which operates in streaming mode, without storing anything on the way. This library, JSONStreamingParser, is different from most of available parsers as it’s able to parse the data on the fly and run a callback when some conditions are met.
In detail, JSON data have a format like following text :
{

name1 : data1,

name2 : {name3 : data3, name4 : data4},

name5 : [data6, data7, data8]

}
Data can contain simple values (strings, numbers, etc) or lists or array of data. The format of simple data is :
name : data
The parser executes a scan of data part; if it’s of a simple kind it calls a predefined function with following parameters :
void callback(uint8_t filter, uint8_t level, const char *name, const char *value)
where the ‘filter’ is reserved for future expansions, the ‘level’ parameter shows the depth level of data inside the json and ‘name‘ e ‘value‘ parameters contains data’s name and value. If data is NOT of a simple kind, but it’s a list or an array, ‘value‘ filds will contain the “<LIST>” or “<ARRAY>” strings and the scan will proceed inside the true value.
By aid of the callbacks is so possible to analyze the JSON data on the fly and store some values on sketch’s variables.
The actual callback function is :
// analyze data and act on devices

void parserCallback(uint8_t filter, uint8_t level, const char *name, const char *value)

{

// check for user name

if(level == 3 && !strcmp(name, "screen_name") && !strcmp(value, "\"" TWITTER_USER "\""))

gotUser = true;

// check twitter message - MUST contain the requested hashtag, a port number and word ON or OFF

else if(level == 2 && !strcmp(name, "text") && value && value[0] && !strnicmp(value + 1, "#" TWITTER_HASHTAG, strlen(TWITTER_HASHTAG) + 1))

{

// hashtag found, skip it

const char *p = value + strlen(TWITTER_HASHTAG) + 3;

// skip spaces after hashtag

while(*p && isspace(*p))

p++;

// read port number - sets it to 0xff if not found

if(isdigit(*p))

{

port = 0;

while(isdigit(*p))

port = port * 10 + *p++ - '0';

}

else

port = 0xff;

// if port not found, just leave

if(port == 0xff)

return;

// skip spaces after port number

while(*p && isspace(*p))

p++;

// chek for ON or OFF keywords - if not found sets port to 0xff and leave

if(!strnicmp(p, "on", 2))

command = true;

else if(!strnicmp(p, "off", 3))

command = false;

else

port = 0xff;

}

// look if there are previous tweets to handle

else if(level == 1 && !strcmp(name, "next_results"))

{

// get next tweet id to handle

const char *s = strstr(value, "\"?max_id=");

if(s)

{

s += 9;

nextID = readID(s);

}

}

// get max id of search, needet to go further after walk back

else if(level == 2 && !strcmp(name, "id"))

{

uint64_t id = readID(value);

if(id > maxID)

maxID = id;

}

}
The function is quite simple, using the ‘level‘ e ‘name‘ parameters to check if the requested fields are present inside the tweet and, if so, it extracts and analyzes their values. You can see a check on the user whom sent the tweet, the hashtags to see if the given one is present, the ‘text‘ parameter to read the commands and finally the IDs used to check the times of tweets.
As we told above, this callback is called by JSONStreamingParser every time that a value is read from client’s stream. The parser is used by doReceive() function:
// waits for data from twitter and parse them - return true on sucess, false if no data

bool doReceive(FishinoSecureClient &client, JSONStreamingParser &parser)

{

// wait 1 second max for data from server

unsigned long tim = millis() + 1000;

while(!client.available() && millis() < tim)

;

// if no data is available, close the connection

if(!client.available())

return false;

// skip data up to 2 consecutive cr

bool cr = false;

while(client.available())

{

if(cr)

{

if(client.read() == 0x0d && client.read() == 0x0a)

break;

else

cr = false;

}

else if(client.read() == 0x0d && client.read() == 0x0a)

cr = true;

}

while(client.available())

{

char c = client.read();

parser.feed(c);

}

return true;

}
This function just reads client’s data, skip HTTP preamble (which end is marked by an empty line) and sends remaining chars, one by one, to the parser.
Once that the stream has been analyzed, in case of valid command, the global variable ‘port‘ will contain the requested port number and the global variable ‘command‘ (boolean) will be true if we want to set the output to HIGH, false if we want it to be set to LOW.
Let’s see the code chunk that activates the outputs, interesting because it can use (optionally) one or more IOEXPANDERS to Fishino :
// if port has been set, change its output

if(port != 0xff)

{

// if no expanders found, check if pin is free on Fishino

// and set its output (must be changed on Mega!)

if(!numExpanders)

{

if(port == 4 || port == 7 || port >= 10)

Serial << F("INVALID PORT #") << port << F(" -- COMMAND DISCARDED\n");

else

{

Serial << "\n\nSETTING PORT " << port << " TO " << (command ? "HIGH" : "LOW") << "\n";

pinMode(port, OUTPUT);

digitalWrite(port, command ? HIGH : LOW);

}

}

else

{

uint8_t board = port / 8;

if(board >= numExpanders)

Serial << F("INVALID PORT #") << port << F(" -- COMMAND DISCARDED\n");

else

{

Serial << "\n\nSETTING PORT " << port << " TO " << (command ? "HIGH" : "LOW") << "\n";

port %= 8;

expanders[board]->digitalWrite(15-port, command ? HIGH : LOW);

}

}

}
we check port value; if it’s 0xff the command is invalid, so we drop it, otherwise we continue with a code that depends if one or more IOEXPANDERS are connected or not.
In former case, we’ll calculate the board number (port / 8) and the port number on it (port %8). For example, a port number of 33 means board n. 4 (33 / 8) and its port n.1 (33 % 8 = 33 – 4 · 8 = 1). The ‘%’ operator gives the remainder of the division.
If no expander board is connected the sketch uses the available (free) ports on Fishino; it checks that the given port number is valid and that it’s not used by Fishino itself.
IOEXPANDER expansion boards usage
The sketch can detect automatically any IOEXPANDER board(s) connected to Fishino, up to a number of 8. They must, of course, have all differents I2C addresses.
At startup the sketch checks, in setup(), if the boards are available and number them in I2C addresses sequence. If the boards are found their ports are numbered in sequence : from 0 to 7 for the first board, from 8 to 15 for the second, and so on.
If no board are detected, the sketch goes in stand-alone mode, using the free Fishino’s I/O, so the outputs 0, 1, 2, 3, 5, 6, 8 e 9, being the others reserved for embedded periferals. In this case the port number is the Fishino’s I/O number.
Expander boards detection is done by following code chunk :
// find all available IOExpander boards

void findIOExpanders(void)

{

numExpanders = 0;

for(uint8_t addr = 0; addr < 8; addr++)

{

IOExpanderMCP23017 *exp = new IOExpanderMCP23017;

// set expander address

exp->begin(addr);

// this is because expander board hasn't reset connected to arduino one

// and it checks register 0 upon init to see if board is present

// (register should be 0xff, all A port as input)

for(int i = 0; i < 16; i++)

exp->pinMode(i, INPUT);

if(exp->init())

{

// expander found, add to list and setup pins

expanders[numExpanders++] = exp;

// set pin modes

for(int i = 0; i < 8; i++)

exp->pinMode(15-i, OUTPUT);

}

else

// not found, delete expander object

delete exp;

}

if(numExpanders)

Serial << F("Found ") << numExpanders << F(" I/O expander boards\n");

else

Serial << F("No expander boards found - using Fishino's I/O pins\n");

}
You can see a loop that checks all I2C possible addresses (from 0 to 7); for each address a variable IOExpanderMCP23017 is created (dinamycally as a pointer), a test is executed and, if ok, the variable is stored into an array. If the board is not available the variable is destroyed freeing its memory.
In this way the boards are detected in I2C address order.

Download a package with the examples for Fishino
From openstore
I/O expander shield for Arduino

[…] you remember the Fish’n Tweets project? It allowed us to control Fishino’s I/Os using tweets. Well, that was our first experiment […]