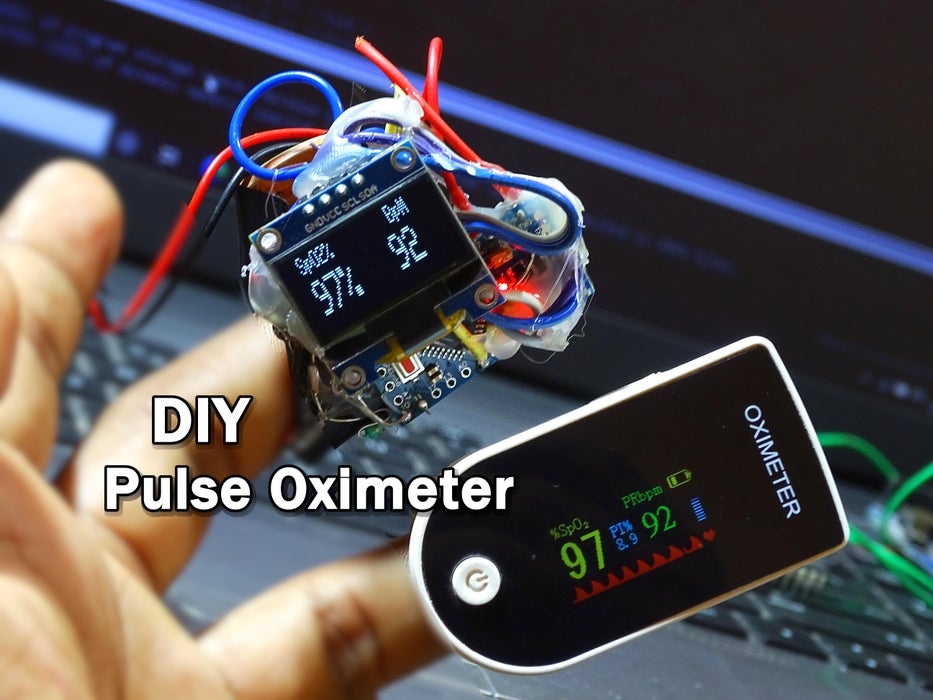
The oximeter is a tool that allows you to calculate the percentage of oxygen saturation in the blood based on the amount of light absorbed. It consists of a photodiode and two LEDs: a red LED and an infrared LED. To make the measurements, the fingertip is placed between the photodiode and the LEDs as shown in the following image. Oxygenated blood absorbs more infrared light while deoxygenated blood absorbs more red light. The processor calculates the ratio between the red light received by the photodiode and the infrared light over different time intervals.

In this project we see how to make this instrument starting from its basic components, that is 2 LEDs and the photodetector. We connected the components as shown in the wiring diagram below. We used an Arduino Pro Mini as a microcontroller and an OLED display to view the data. A 9 Volt battery will power the circuit.

