Unlock the unlimited possibilities of robotics with Braccio! You can assemble your Braccio in a multitude of ways.
Arduino controlled robotic arm, in a tinkerkit that allows you to assemble it in different configuration, specifically thought for different applications.
Because it is designed for versatility, the Braccio can also support various objects on the end of the arm.
For example, you can use Braccio:
-
with your camera to follow a subject,
-
by mounting your telephone or your tablet to follow you when you’re at a video conference,
-
with a solar panel to follow the sun.
The TinkerKit Braccio is sold as a kit and requires assembly before use. A setup guide is included in the box, or you can download it here.
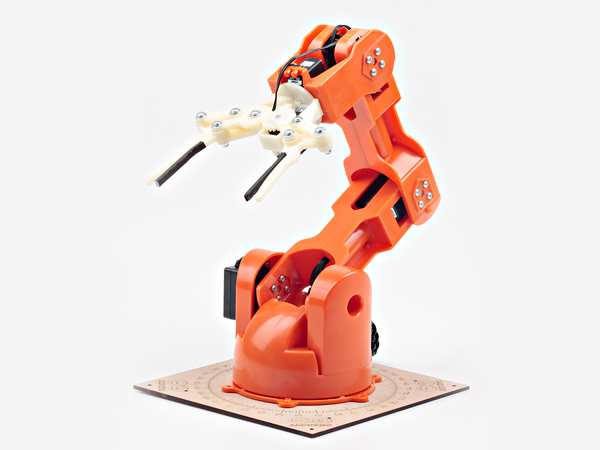
After assembly, you can adjust the alignment of all the motors by running the sketch called “testBraccio90” in the Braccio examples.
The sketch will position the Braccio in the upright position shown below. If it isn’t in this position, you will need to realign the servos (see the setup guide for details on how to do this).
Features:
| SpringRC SR431 – Dual Output Servo
|
|
| Control Signal | PWM Analog |
| Torque
|
@ 4.8V: 169.5 oz-in (12.2 kg-cm)
@ 6.0V: 201.4 oz-in (14.5 kg-cm) |
| Weight | 2.19 oz (62.0 g) |
| Dimentions | 1.65×0.81×1.56 in (42.0×20.5×39.5 mm) |
| Speed
|
@ 4.8V: 0.20 sec/60°
@ 6.0V: 0.18 sec/60° |
| Rotation Support | Dual Bearings |
| Gear Material | Metal |
| Rotation Range | 180° |
| Connector Type | J (aka Futaba) |
| SpringRC SR311
|
|
| Control Signal | PWM Analog |
| Torque
|
@ 4.8V: 43.13 oz-in (3.1 kg-cm)
@ 6.0V: 52.86 oz-in (3.8 kg-cm) |
| Weight | 0.95 oz (27.0 g) |
| Dimentions | 1.23×0.65×1.13 in (31.3×16.5×28.6 mm) |
| Speed
|
@ 4.8V: 0.14 sec/60°
@ 6.0V: 0.12 sec/60° |
| Rotation Support | Dual Bearings |
| Gear Material | Metal |
| Rotation Range | 180° |
| Connector Type | J (aka Futaba) |
More details and specs: Braccio
