If you need a robot to traverse piping systems, this arduino powered six-wheeled robot could be just the thing!
Pipeline systems deteriorate progressively over time through various means. Pipeline inspection robot are designed to remove the human factor from labour intensive or dangerous work environments and also to act in inaccessible environment. However, if you take a look at the prices of those robots you will find that they are way too expensive.
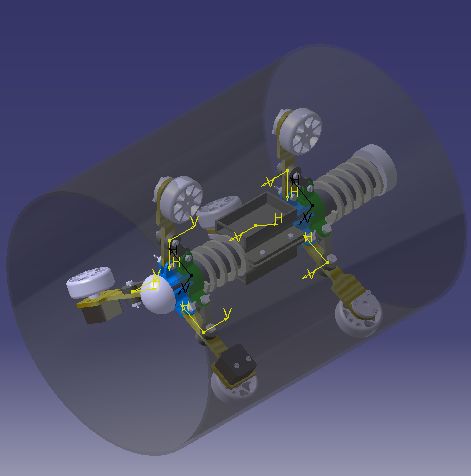
This project aims to create another kind of pipeline inspection robot. Because we think that It is beneficial to have a robot with an adaptable structure to the pipe diameter, and cheaper at the same time.
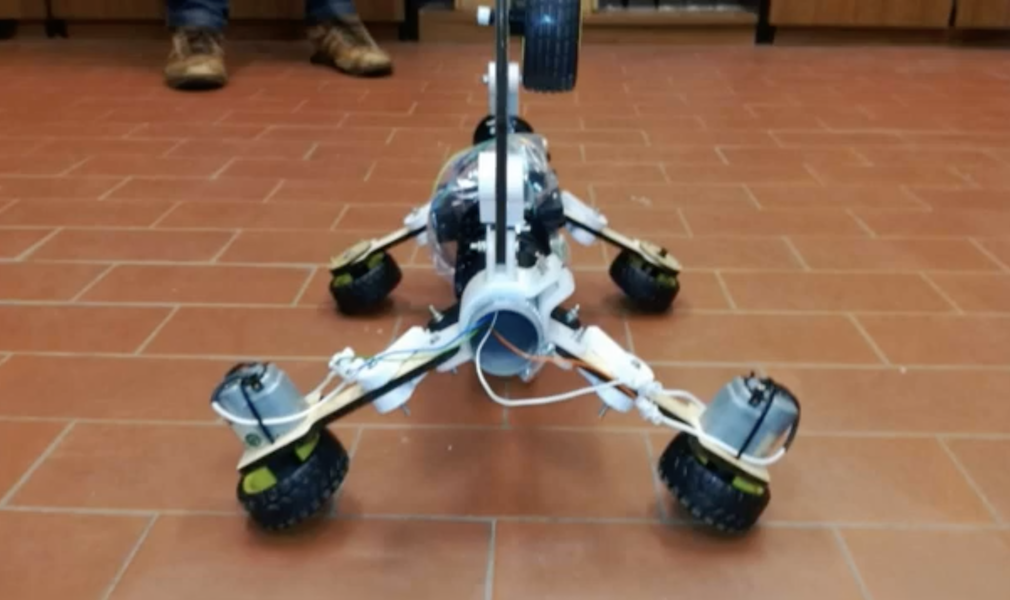
The device features six spring-loaded wheel assemblies that help it get a grip on different diameters of pipe, with two of the wheels powered for locomotion. Two separated sliding mechanisms are fitted onto a PVC central tube. Each sliding mechanism has three legs fixed to a cylindrical collar and linked to the sliding cylinder by a small link.
An Arduino Uno controls the uniquely-shaped bot, with an LN298N H-bridge used to regulate the three 9V batteries wired in series that run the motors.
All you need to build your own pipeline inspection robot is:
Microcontroller
- 1x Arduino Uno
Motor Controller
- 1x H-Bridge (L298N)
- 22AWG Solid core wire
- 220V SMD Rework Soldering Station
Power
- 4x 9V Battery ( 1 to power the Arduino and 2 for the motors)
Other Electronics
- 2x 12VDC motors
- DPDT Toggle switch (Power switch)
- SPDT Slide switch (User input)
- Heat Shrink Tubing
Hardware
- 6x laser cutted links (the motor links are slightly different from the other links)
- 6x PLA small links (printed)
- 2x Collars (printed)
- 2x Translational elements(printed)
- 1x Electronic parts holder (printed)
- 2x Strong rectangular springs (printed)
- 2x Motor-wheel pin (printed)
- 4x Link-wheel pin (printed)
- 2x bushing for motors (printed)
- 4x 7mm bearings
- 18x 3mm bolts
- 7x 2.5mm bolts
- 7x Zip ties
- 6x robot tire plastic wheels
- 1x end blocker
- 14x 2.5mm pgp-fasteners
- 36x 3mm nuts
- 14x 2.5mm nuts
- 50x 3mm shims
- 1x 40mm PVC tube
Find out more information in the video below or in the related Instructables project’s page.

Is it able to go through pipe elbows, and doe3s it have the feature of vertical motion?