Inspired by the excellent coverage of Octoprint and Octolapse, the maker Jeremy S Cook has recently assembled a 3D-printable mount for a Raspi camera, giving him another aiming axis for observing 3D prints.
After installing Octoprint and setting it up with my 3D-printer, I needed a way to mount everything on a wire rack that I got from Amazon. Also, I wanted a way to hold and properly aim a Raspberry Pi camera. What I came up with, I’m quite pleased with, so check out the video to see the story.
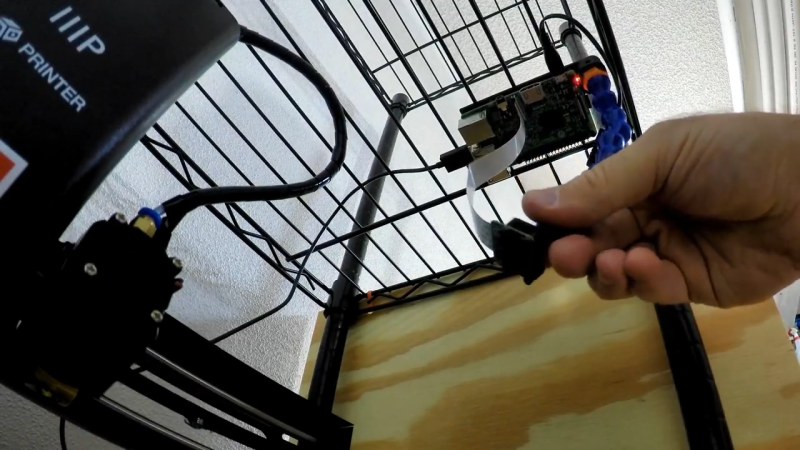
If you like the coolant hose concept, this could certainly be applied in other situations, and the zip-ties make it quite versatile. As set up here, it slides along the rack, giving it another aiming axis for observing 3D prints.
All you nedd for this project is:
- Hanging-pi base 3DP
- Camera-mount 3DP
- (4) Zip-ties
- (8) 4-40 screws
- 3/8″ BSPT Coolant Hose (eBay)
- Raspberry Pi
- Raspberry Pi Camera (Amazon)
- Amazon Basics Wire Shelving Unit (Amazon)
- Monoprice Select Mini 3D Printer (Amazon)
The design he came up with uses the flexibility of the coolant hose to provide an endlessly configurable camera arm. Furthermore, since he mounted it to the rack with zip ties, the whole rig shimmies back and forth, providing a bonus axis for even more camera views.
Well, let see how it works in the video below:
