- Building a 3D Digital Clock with ArduinoPosted 4 months ago
- Creating a controller for Minecraft with realistic body movements using ArduinoPosted 5 months ago
- Snowflake with ArduinoPosted 5 months ago
- Holographic Christmas TreePosted 5 months ago
- Segstick: Build Your Own Self-Balancing Vehicle in Just 2 Days with ArduinoPosted 6 months ago
- ZSWatch: An Open-Source Smartwatch Project Based on the Zephyr Operating SystemPosted 7 months ago
- What is IoT and which devices to usePosted 7 months ago
- Maker Faire Rome Unveils Thrilling “Padel Smash Future” Pavilion for Sports EnthusiastsPosted 7 months ago
- Make your curtains smartPosted 8 months ago
- Configuring an ESP8266 for Battery PowerPosted 8 months ago
Home Automation with DIY IFTTT Trigger
Web site:
http://www.instructables.com/id/Triggering-IFTTT-from-Arduino-using-Lithouse/Project Summary:
We built an Arduino-based DIY motion detector and trigger IFTTT events from it. You may create IFTTT recipes for receiving email if someone is inside the house or switching a Belkin WeMo when you walk into a room. The motion detector talks to IFTTT using our cloud service Lithouse (https://www.lithouse.co/).
You can make any DIY device and use Lithouse (https://www.lithouse.co/) to talk to IFTTT.
Full Project:
In this project, we will build a motion detector and trigger IFTTT events from that device. As the motion detector cannot directly connect to IFTTT, we will use Lithouse as the broker.

Step1: Building the DIY Motion Detector
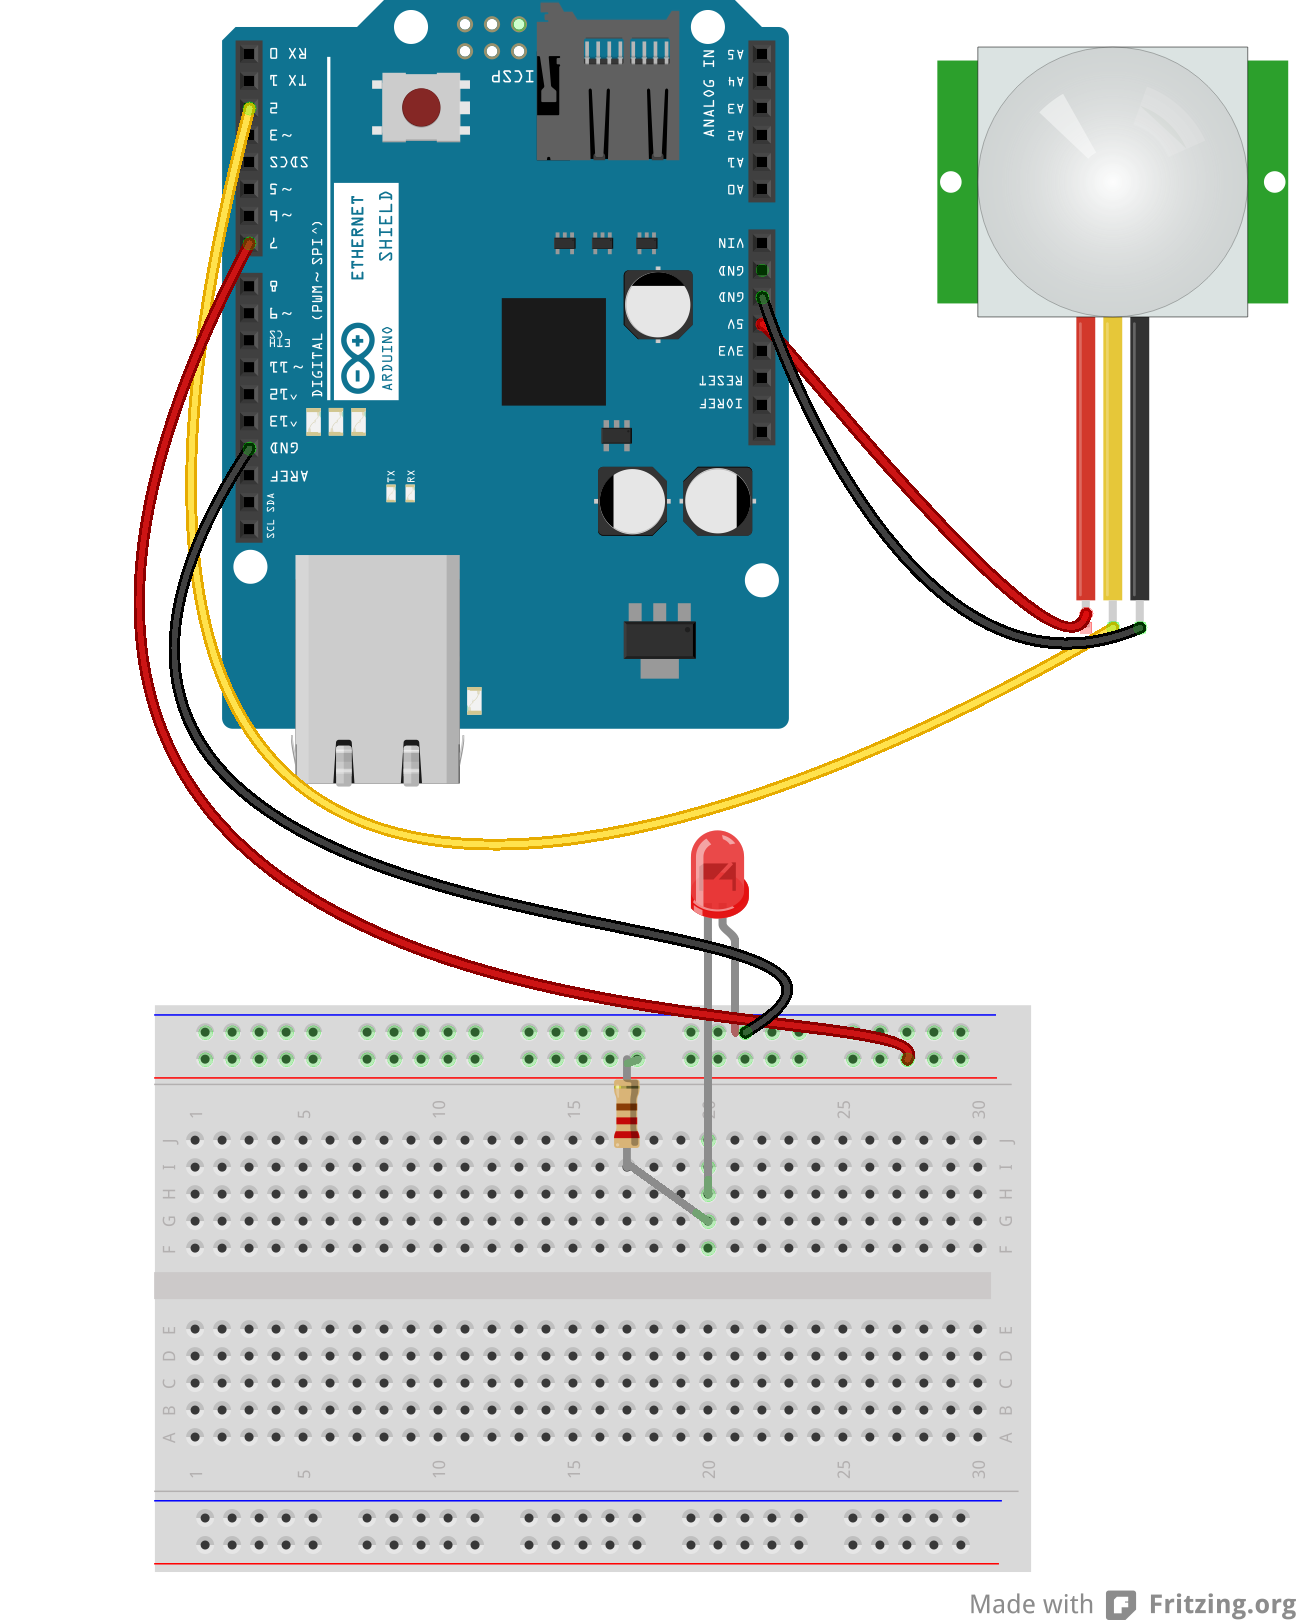
You will need the following components:
- LED, Breadboard and some Wires.
- Mount the Ethernet Shield on Arduino.
- Connect the 5V and GND pin of the PIR to the respective heads of the Arduino Ethernet Shield.
- Connect the PIR’s output pin to the pin #2 of the Ethernet Shield.
- Connect the negative (short) leg of the LED to GND of the Shield.
- Connect the positive (long) leg of the LED to one of the end of the 330 Ohm resistor.
- Connect the other end of the 330 Ohm resistor to the pin #7 of the Shield.
Step2: Register with Lithouse
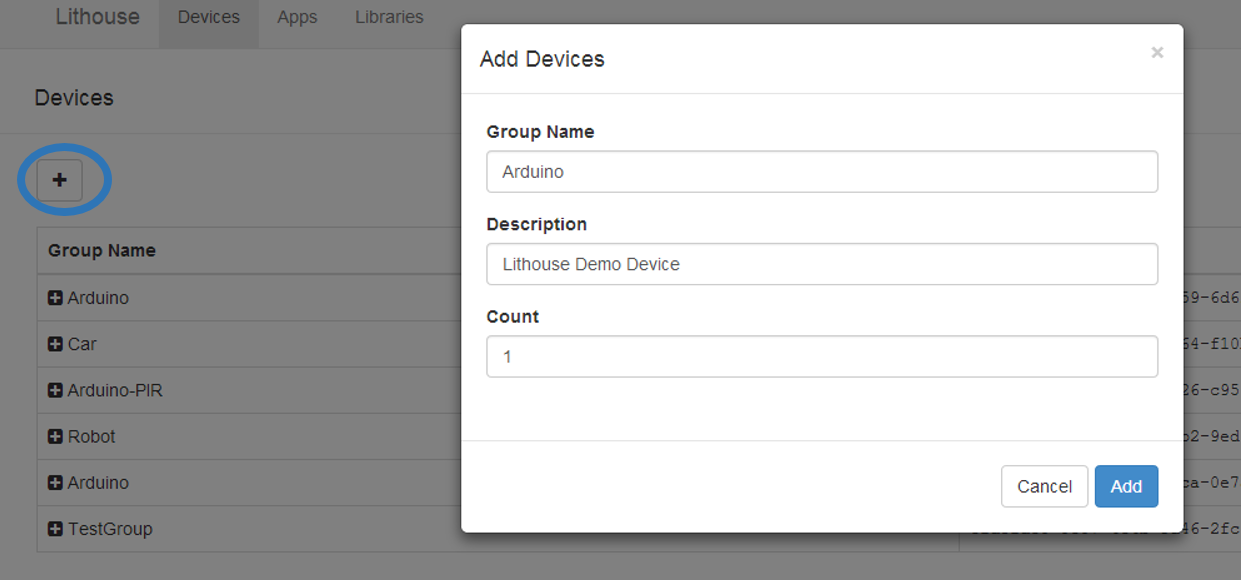
Now, let us register the device with Lithouse:
- Login to Lithouse portal.
- Go to Devices tab and click the ‘+‘ button. A new window will show up.
- Provide a meaningful name and description for your device group.
- Then hit Add.
Step3: Software Setup

- Download and install Arduino IDE.
- Download Lithouse Arduino library.
- Go to the Arduino IDE’s home folder. Then go inside the libraries folder. Now, unzip Lithouse client library here and rename it to Lithouse.
- Launch the Arduino IDE. Open LithousePIR (File > Examples > Lithouse > LithousePIR).
char deviceKey [] = "YOUR_DEVICE_KEY";
- Go back to Devices tab and expand the group you just created by clicking the ‘+‘ on the left of group name.
- Then click the ‘copy’ icon beside the device key to copy it into the clipboard.
- Paste the device key in your sketch.
The program is now ready. Please upload it to Arduino.
You can test by moving a hand in front of the PIR sensor. The LED should turn on.
For more information regarding setup and debugging, please visit our tutorial.

- Login to Lithouse portal.
- Open your profile and click on activate.
- On the resultant pop-up, please provide your IFTTT email channel’s address.
- Once you hit Verify, you will receive a verification email from Amazon Web Service (We use AWS for sending emails to trigger@ifttt.com on your behalf).
- Please check your inbox and accept the verification request.
Step5: Sample Recipe
Congratulations! Your DIY Motion Detector can now trigger IFTTT events. Here is a recipe for turning on a WeMo switch. You may change the ‘that’ part of the recipe based on your needs.
Please contact us with your questions and suggestions.

9 Comments
Leave a Reply
-
 Arduino ISP (In System Programming) and stand-alone circuits
We use an Arduino to program other ATmega without...
- Posted 12 years ago
-

-

-
 GSM GPS shield for Arduino
Shield for Arduino designed and based on the module...
- Posted 12 years ago
-
 Small Breakout for SIM900 GSM Module
Some post ago we presented a PCB to mount...
- Posted 13 years ago
-
 Join Maker Faire Rome 2024: Innovation Unleashed at Gazometro Ostiense | Calls Now Open!
All Calls Now Open for Maker Faire Rome 2024...
- Posted 2 weeks ago
-
 Building a 3D Digital Clock with Arduino
Project to create a digital clock consisting...
- Posted 4 months ago
-
 Acoustic amplifier – in DIY Kit
This kit creates a microphone amplifier with an output...
- Posted 5 months ago
-
 Creating a controller for Minecraft with realistic body movements using Arduino
Project of a controller that maps body movements...
- Posted 5 months ago
-

Pingback: IFTTT and your own hardware |
Pingback: Diy Automation | onlinesystembackup.com
Pingback: Fantasy MMORPG
Pingback: AQW