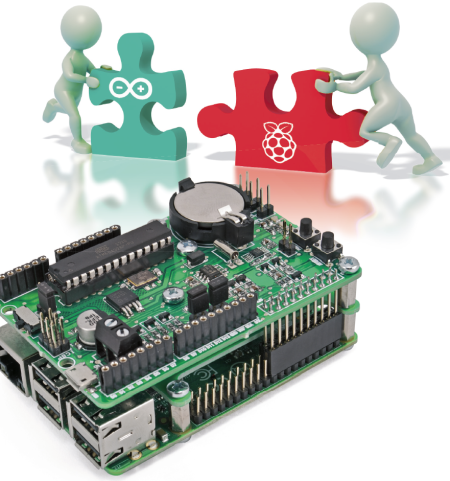
Let’s do some preliminary work with the board that bridges Arduino and Raspberry Pi: before getting into complex applications we’ll play by using cheap and available hardware components.
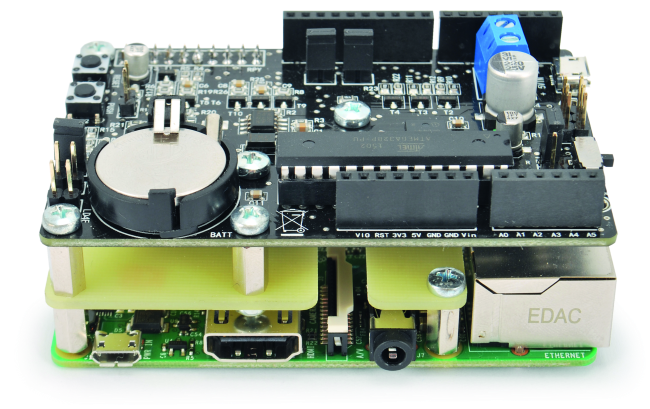
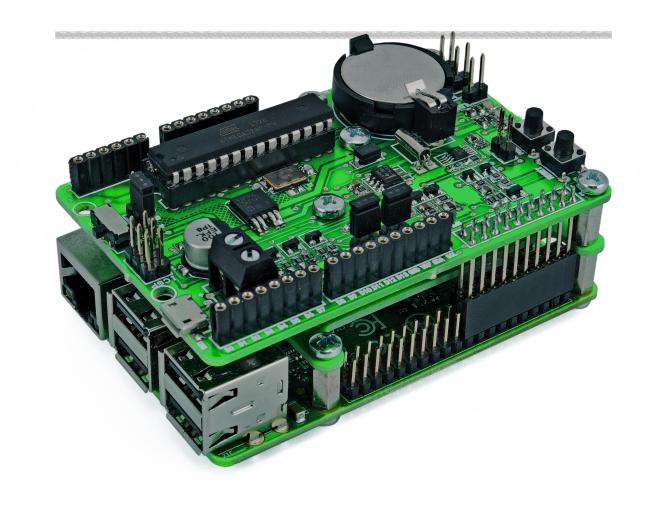
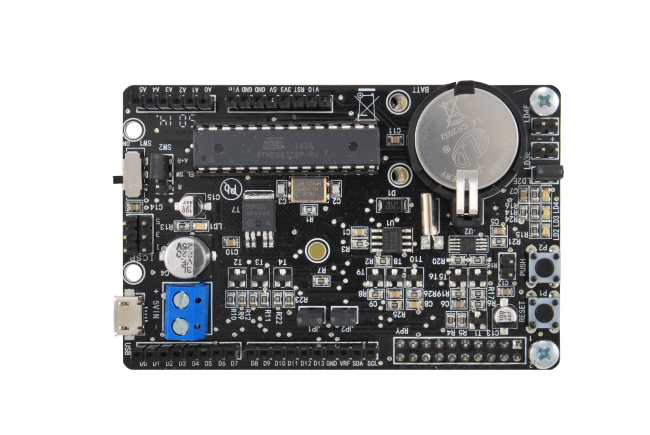
RandA is a board that allows Arduino and Raspberry Pi to cooperate: it can be mounted on the latter and opens up a world of new possibilities, typically not available when units the two separately.
Before starting to analyze some complex and complete applications we are already thinking about, we will propose you some practical hints that will help you practice a little with RandA and its versatility.
Let’s start with a first application to use a device widely and cheaply available now: the Webcam control.
GitHub
Download the software for this application from our Repository.
Environmental Monitoring with Webcam
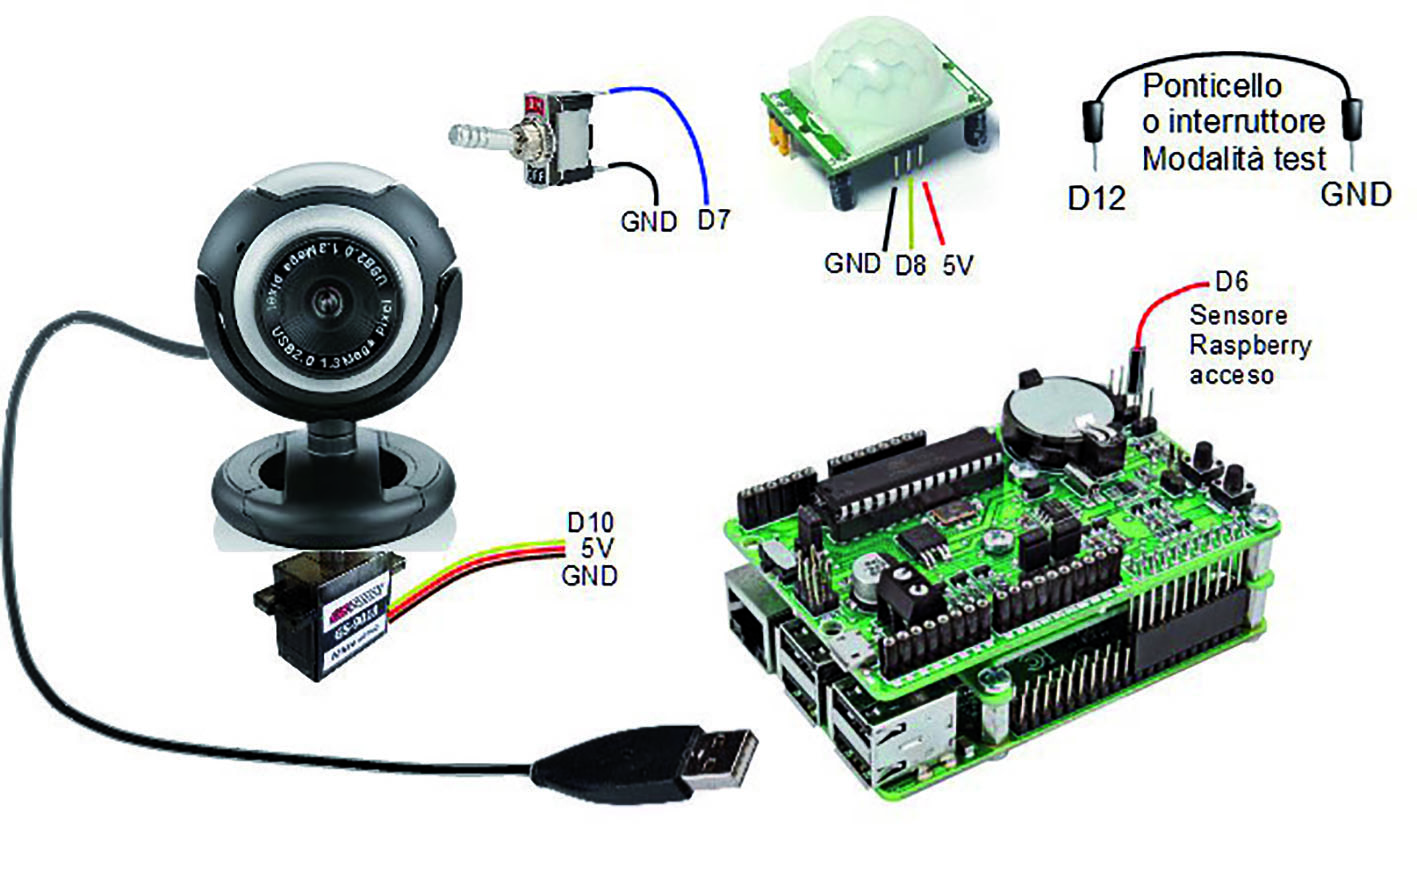
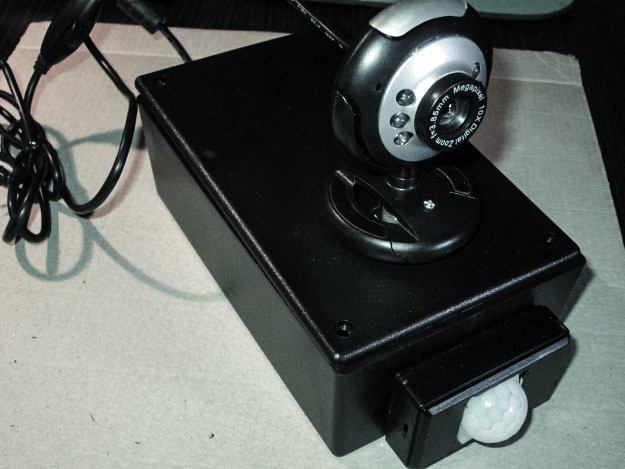
Using a standard USB Webcam and a micro-servo, we can build a remotely controlled webcam 180° tilting and panning platform.
Now we have to connect the Webcam to Raspberry Pi through a USB port and the servo three wires to RandA. Precisely: the red cable to the central pin corresponding to 5V, the brown cable to the GND pin and finally the yellow cable to an output pin for driving, for example the D10 pin.
To view the camera stream via web we can use the “motion” software that we can install on Raspberry Pi using the command:
sudo apt-get install motion
But first it is better updating your system with the command:
sudo apt-get update.
This software also has an integrated motion detection, but this time we will use as an intrusion detector a PIR sensor: the reason is that we will use the opportunity offered by RandA to turn Raspberry Pi on just when needed. Arduino instead is always powered on since it has a very low consumption. To give you an idea of the configured scenario, table summarizes some consumption data.
| Arduino Uno(USB powered)(With ATMEGA328P)(Clock: 16MHz) | Normal operation.(Consumption due to ATmega328P + USB interface circuits). | About 48mA(No devices connected to any port). |
| Operation in Sleep (Power Down Mode) triggered by an external interrupt (pin 2 or 3).The USB interface circuits remain active; the ATmega actually consumes few microamperes. | About 34mA(Due almost entirely to the board). | |
| RandA(With Raspberry Pi+ and ATMEGA328P)(Clock: 16MHz) | Normal operation Arduino and Raspberry Pi+.(Arduino includes only the ATmega328P, because USB interface circuits are missing). | About 330mA. |
| Operation with Raspberry Pi off.(Only ATMEGA328P but with connection to PIR and servo active). | Approximately 28mA.(23mA without servo) | |
| Operation with Raspberry Pi and Arduino off in Sleep (Power Down Mode), they can be awakened by external interrupt. This time the ATmega consumes a few milliamperes even in power down because of the ports connected to Raspberry Pi. | <7mA3.2mA (ATmega)3,7mA (board only)12mA with PIR and servo connected |
So with Arduino in power-down, power consumption is reduced to only 7 mA (or 12 mA in environmental control operating configuration). We could then connect the PIR sensor to D3 pin corresponding to external interrupt number 1 to wake Arduino, which in turn activates Raspberry Pi. But, not to complicate the sketch too much, we will use for this example the 28mA consumption configuration by keeping Arduino always on, waiting the intrusion event.
To summarize: only in presence of PIR sensor signaling, Arduino will turn Raspberry Pi on. The latter will then take a picture, send it via e-mail and will stay on for a possible live web connection, allowing a continuous view and a panoramic environment survey. The environmental control will be activated or deactivated by a switch connected to Arduino (the pin D7) (when leaving or returning home).
Besides, a further pin (pin D6) will be used to verify if Raspberry is on or not. This pin is in fact connected to the positive pole of LD3 connector which is in parallel to the power supply. (NB If LD3 is used for an external LED, the voltage at the positive terminal would be reduced to 1.2V and therefore you should read it with an analog input, for example A0).

Made the mechanical part and all the connections, it is time to move on to software. Specifically we will:
✦ appropriately configure the “motion” software;
✦ create an HTML page to display the camera “stream”;
✦ put on that page also the panning controls;
✦ create CGI scripts to control Arduino;
✦ create an Arduino sketch to detect the PIR signal, turn Raspberry Pi on and drive the servo according to the commands received from the Raspberry Pi serial interface; the sketch must also detect the on / off system switch state.
The “motion” software
The “motion” software is a powerful (free) video management tool aimed at detecting movements occurred in front of the Webcam. The site www.lavrsen.dk/foswiki/bin/view/Motion/WebHome reports a complete documentation.
In fact, “motion” has so many features. First of all, it includes a Webcam streaming dedicated http server. And it can also be remotely configured, by adding a further http port, about the video stream management. A functionality that we will not use this time.
The main activity is to detect motion by monitoring how many pixel changes in a certain timing. All parameters we can set: number of pixels required to trigger the event, the margin of error, possible frame areas to control etc. Those can be changed by adjusting a long configuration file named “motion.conf”.
In case of an event, it can take one (or more) pictures or record a movie of preset length. Furthermore you can run a script triggered by the event. And it is clear that we will use this feature to send an email with photos attached.
When our primary PIR sensor detects motion, it will turn Raspberry Pi on that will run “motion”. After a certain and inevitable delay due to Raspberry Pi startup, “motion” will be ready to take over the surveillance activity in the area under observation and then can take a photo and send the email. Clearly, since the aim of the application, the tens of seconds required by Raspberry Pi to start have no influence on the event capture, which certainly does not end in a few seconds.
Now Raspberry Pi stays on and is ready to receive any http connection on its HTML dedicated page. The page allows displaying the stream routed by “motion” server port (port 8081, editable). The page also allows you to send a reset command that resets the initial condition with Raspberry Pi off.
To allow webcam control we created a “Webcam test” mode: Raspberry Pi is turned on immediately when RandA detects the “system switch on” trigger and will stay on without detecting motion and without taking photos. In this way, the web server is always available for viewing camera stream and panning the webcam. The “test” mode is activated at RandA startup, by connecting the D12 pin to GND.
The “motion” standard configuration file is in the directory “/ etc / motion”. This file must be edited both to allow motion control and to stream the camera output. So we’ll make two copies: one will be in “/ home / pi” (user’s folder pi) and one will be in the same CGI script folder.
The first copy will be used in case Raspberry Pi is turned on by an alarm; and it will set up “motion” to take a picture and activate the script that sends it via email. While the second file copy will be used just to turn the camera on, thus without taking pictures.
The configuration file shall be modified according to table.
| VARIABLE | ORIGINAL VALUE | CONFIGURATIONFor MotionDETECTION | CONFIGURATIONFor BROWSERstreaming | DESCRIPTION |
| daemon | off | on | on | Background execution. |
| process_id_file | /var/run/motion/ motion.pid |
/tmp/motion.pid | /tmp/motion.pid | File that contains the process PID. Useful to kill it. |
| framerate | 2 | 24 | 24 | Frames per second per sequence of photos and movies. |
| output_normal | on | first | off | Snap and save photos when it detects movement: off disables, first save the first picture taken. |
| gap | 60 | 10 | 60 | Elapsed seconds to declare the event closed. |
| ffmpeg_cap_new | on | off | off | Mpeg movies (disabled). |
| Webcam_maxrate | 1 | 24 | 24 | Frames per second as a Webcam. |
| Webcam_localhost | on | off | off | Local view only (no). |
| control_port | 8080 | 0 | 0 | Remote control: disabled. |
| on_picture_save | inactive(Commented) | /home/pi/ sendPicture.sh% f |
inactive | Script activated when a picture is taken. % F contains the file name. |
As described in the basic configuration file, in case of motion detection one photo is taken and it is saved to “/ tmp / motion”. The file name will contain a timestamp reference and it is stored in the “% f” variable. Among the different events type we will use only the one activated by the shutter click, passing the file name to the script also.
Note that before sending an email with “SendMail” you must configure the file “Mail.properties”.
The script activated by this event is called “/home/pi/sendPicture.sh” and is visible in Listato1.
| Listing 1 – sendPicture.sh |
#!/bin/bash /home/pi/bin/SendMail mailto=pippo.pluto@gmail.com subject=”Alarm!” attach=$1 sudo pkill motion |
The “motion” software will be executed by the command:
motion -c configfilename
As said, the “motion” program will be launched at Raspberry Pi power on that in turn is switched on by the PIR sensor detecting a movement; then “motion” will take a picture and send it through email. The Linux operating system launches the script “/etc/rc.local” at boot. Instead of modifying this file to run “motion” we recommend to edit rc.local by adding a link to a script placed in the user’s folder. In this way, we can modify the execution of programs or scripts without changing the Linux file system and without needing Root permissions. For example, as in Listing 2.
| Listing 2 – to be added at the end of /etc/rc.local |
FSTARTUP=”/home/pi/pistartup.sh” if [ -x $FSTARTUP ]; then sudo -u pi /home/pi/pistartup.sh fi exit 0 |
While in Listing 3 describes the script launched at start.
| Listing 3 – pistartup.sh |
#!/bin/bash
#exit 0
ser=/dev/ttyS0
stty -F $ser 9600
sleep 5
echo “M” > $ser
echo “Comando M” > /home/pi/start.log
sleep 1
read -r -t 2 replay < $ser
if [ ${#replay} -lt 4 ]; then
echo “Nessuna risposta!” >> /home/pi/start.log
exit 1
fi
replay=${replay:0:4}
echo $replay >> /home/pi/start.log
if [ $replay = “TEST” ]; then
echo “No motion” >> /home/pi/start.log
exit 0
fi
if [ $replay = “CTRL” ]; then
echo “Start motion!” >> /home/pi/start.log
sudo pkill motion
motion -c /home/pi/motion-detect.conf
fi
|

HTML Web Server page
In this application the Web Server is enabled only in consequence of an alarm (except in test mode). Access will be enabled only by password, to prevent outsiders to spy our room with the Webcam. To enable security in Tomcat you must edit “/WEB-INF/web.xml” in the same folder that contains the application. To isolate the application it is better not to use the “ROOT” folder but is recommended to create a new folder under “webapps” folder, that is the shared web applications folder. In fact, besides the base application put in ROOT, in webapps there are other folders each corresponding to an application (whether it is static, with servlet or using CGI).
However, every folder must contain the two subfolders META-INF and WEB-INF with a web.xml file in it.
We create a “ControlloAmbientale” folder and the two “META-INF” and “WEB-INF” subfolders. In “ControlloAmbientale” let’s put our HTML page. While in “WEB-INF” will create web.xml as in Listing 4.
| Listing 4 – web.xml |
<web-app xmlns=”http://java.sun.com/xml/ns/javaee” xmlns:xsi=”http://www.w3.org/2001/XMLSchema-instance” xsi:schemaLocation=”http://java.sun.com/xml/ns/javaee http://java.sun.com/xml/ns/javaee/web-app_3_0.xsd” version=”3.0” metadata-complete=”true”> <description> Controllo ambientale con password</description> <display-name>ControlloAmbientale</display-name> <security-role> <description>ControlloAmbientale</description> <role-name>Controllo</role-name> </security-role> <security-constraint> <web-resource-collection> <web-resource-name>ControlloAmbientale</web-resource-name> <url-pattern>/*</url-pattern> </web-resource-collection> <auth-constraint> <role-name>Controllo</role-name> </auth-constraint> </security-constraint> <login-config> <auth-method>BASIC</auth-method> <realm-name>ControlloAmbientale</realm-name> </login-config> <!-- --> </web-app> |
At this point, we will have to set the authorization for the application acting on the file “/home/apache-tomcat-7.0.47/conf/tomcat-users.xml” by adding the line:
<User username = “foo” password = “bar” roles = “Control” />
Obviously, the username and password are indicative and should be replaced with your own.
Finally, we will create the “cgi” folder in “WEB-INF”. Folder that contains bash scripts application.
The HTML page (for example, named “webcam.html”) is put in the application folder (ControlloAmbientale) and then will be referenced as:
http: //……/ ControlloAmbientale / webcam.html

The access will be granted by specifying the username and password that you set.
The page requires an HTML5 enabled browser because of the slider command and the simplified cam stream display mode offered by that standard. We suggest using Chrome, which render a better graphics for these new HTML5 elements compared to Internet Explorer.
Substantially it contains:
✦ The box where you see the Webcam stream;
✦ A cursor to move the Webcam;
✦ Three buttons = one to activate the Webcam stream, one to activate auto-scan mode (continuous panning) and one for reset (An additional button to refresh the alarm signal useful in test mode).
The stream box is a simple image frame whose “source” refers to another web server (port 8081). In fact, as mentioned, the “motion” software can also create its own web server:
| <Div align = “center”><Img id = “vid” src = “http: //: 8081 /” width = “320” height = “240” style = “background: # 999; border: # CF3 groove” /> & nbsp;</ Div> |
Of course, the buttons are controlled by Javascript functions. The HTML page along with all the software mentioned so far is contained in the compressed archive “ControlloAmbientale.zip” downloadable from https://github.com/open-electronics/RandA/ .
JavaScript functions to control the Webcam
Functions are in AJAX and then communicate with the web server in background. Essentially, they launch bash scripts passing them the parameters needed (CGI mode). To activate the Webcam you just run a bash script on Raspberry. However, to move it the bash script will be responsible for sending a command to RandA through the serial port.
The “panning” cursor calls the corresponding function only when you release the mouse button. So the Webcam position is updated not continuously.
CGI scripts triggered by JavaScript functions
For this application, it was decided to use the CGI mode to avoid programming a full web service application, through its Java and Servlet elements, more complex and not known by everyone. Nevertheless, of course, those who know Java Web Application can easily implement the data stream via AJAX Servlet or JSP.
Scripts are conceptually divided into two parts: the first is the parameters passed from the Javascript function detection, while the second part is the real action request. The parameters are included in the environment variable “QUERY_STRING” that the operating system passes to the script (is a task performed by Tomcat). In practice it scans the string to detect the name = value pairs separated by ‘&’.
Having done that, you can also answer for example through a “echo ….”. In fact, the output stream is intercepted by Tomcat and sent via http.
The scripts should be placed in the “/ WEB-INF / cgi /” application folder.
The first script, “StartWCam.sh”, launches the “motion” program. The second, “RandAcmd.sh”, performs the interaction with RandA through the serial port “/ dev / ttyS0” that corresponds to the port RandA is connected to.
| Listing 5 – StartWCam.sh |
#!/bin/bash
qstring=$QUERY_STRING
qstring=${qstring//&/ }
read -r -a par <<< “$qstring”
ang=-1
for p in ${par[@]}; do
pn=${p%=*} # pn contiene il nome
pv=${p#*=} # pv contiene il valore
if [ $pn = “wcam” ]; then
fstart=$pv
fi
done # fine ciclo
mconfig=”/home/apache-tomcat-7.0.47/webapps/ControlloAmbientale/WEB-INF/cgi/motion.conf”
if [ $fstart = “OK” ]; then
motion -c $mconfig # lancia motion e risponde alla chiamata http
echo “Content-type: text/html”
echo “”
echo “OK”
else
pid=$(< /tmp/motion.pid) # altrimenti chiude motion e risponde
sudo kill $pid
echo “Content-type: text/html”
echo “”
echo “NOK”
fi
|
| Listing 6 – RandAcmd.sh |
#!/bin/bash
ser=/dev/ttyS0
qstring=$QUERY_STRING
qstring=${qstring//&/ }
read -r -a par <<< “$qstring”
for p in ${par[@]}; do
pn=${p%=*} # pn contiene il nome
pv=${p#*=} # pv contiene il valore
# parsing del comando ed invio ad Arduino
case $pn in
QM)
echo “M” > $ser
;;
QA)
echo “Q” > $ser
;;
AN)
echo “A”$pv > $ser
;;
SC)
echo “S”$pv > $ser
;;
RA)
echo “R” > $ser
;;
esac
done # fine del ciclo
sleep 0.2 # Ritardo per dare tempo ad Arduino di rispondere
read -r -t 2 replay < $ser
echo “Content-type: text/html”
echo “”
echo $replay # risposta http (alla funzione Javascript)
|
Sketch for environmental control
As mentioned, the sketch will take control of the system, turning on and off Raspberry when needed. First, move the SW2 jumper to position “Arduino always powered” (do this with the system off). The other two JP1 and JP2 jumpers are close as standard configuration.
At boot, the sketch must enable D7 pin in “INPUT_PULLUP” mode to check the switch position, D8 pin in “INPUT” mode to receive the PIR signal and D10 pin in “OUTPUT” mode to control the servo via the library “Servo.h” that it should be included in the sketch. It must also enable the D6 pin in “INPUT” to verify if Raspberry is on or off and the D12 pin in “INPUT_PULLUP” to check if you are in test mode or NORMAL.
Finally it must set the serial port speed to default (9600) and initialize the servo with the “attach” command. CGI script commands to change the servo position will come from the serial port.
In normal mode, in the main loop, the sketch must:
- Read the switch status to decide whether to activate other functions or remain on standby (control disabled); passing from idle state to the operating state (i.e. when we are leaving the room and we want to turn the environmental control on), will have to wait a few minutes before operating to allow us to go out;
- Read the RIP status to verify if an event occurred. If so, it will proceed turning Raspberry Pi on; as soon as it is ready, it will take a picture and attach it to the email that will be sent, then keeps it running until any standby command is sent via the HTML page.
Since this is a demonstrative example, we used a switch to enable or disable the “environmental control”. In an actual application, we had to camouflage the switch, or to use a series of buttons to press in a certain order (code password). Or, even, connect the on / off switch to a remote control, to disable it before entering the room.
To make the system more flexible, we have also included a “Test Webcam” mode. This mode is activated by grounding pin D12 with a jumper or a further switch.
This mode is enabled at RandA startup (or reset) and turns Raspberry Pi on immediately without considering any alarms. In this way, the system ends up working as a server for Webcam images displaying and moving.
Conclusions
With low cost materials, we have made a sophisticated environmental control that allows us to watch the intrusion in live streaming. Obviously, this system could be complemented with a remote control instead of a physical switch, to allow the activation and deactivation from outside the room. You might also add a GSM modem with SIM to add SMS sending or to avoid the use of an ADSL modem-router.
From the store
