
“I recently found a Hittite (acquired by Analog Devices in 2014) HMC624LP4E evaluation board gathering dust in my miscellaneous PCB bin and thought it might be a great little project to add a microcontroller interface to it so I can use it as a convenient digital attenuator in my lab. The HMC624LP4E had been replaced by Analog Devices’ HMC624A-EP but these two chips are mostly identical so everything described in this post can be applied to the newer HMC624A as well.”
Using an Arduino Kerry D. Wong decided to give a new life to its HMC624LP4E evaluation board.
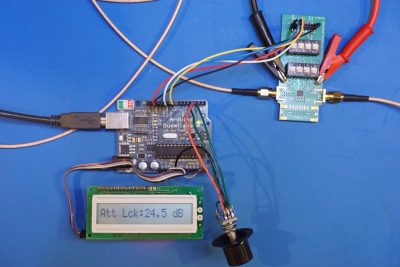
The attenuator functions through a set of switches to set power dissipation from 0 to 31.5 dB, but it can use a serial interface for this function as well. In his new setup, the Arduino provides the needed control signal, via a user interface consisting of an encoder and LCD display.
“On the evaluation board, a parallel interface with six switches is used to change the input attenuation. HMC624LP4E can also be controlled using a three-wire serial interface (SPI). The control is quite simple, all that is required is to send a single byte which represents the attenuation steps. With 6 bits, a total of 64 steps can be achieved while adjusting the attenuation from 0 dB to 31.5 dB, with each step representing a 0.5 dB change in attenuation.”
The fact that it’s now programmable would also open up automated testing possibilities. For further information you can watch the video below:
