
After his friend’s VW Beetle was stolen, Ben Schroeder decided that he needed to protect his 1966 Beetle.
So, as any Maker would do, he took matters into his own hands with a GPS(EM-506 GPS)-enabled Arduino Uno in a locked glove compartment. Unless the unit is turned off, if itdetects that the car is moving, it uses a relay to switch the horn on. Unless the car is turned off, then the horn will continuously honk. Even if the car is then turned back on, the horn would still honk.
First of all, he connected an Arduino-controlled relay in parallel to the horn switch on the steering wheel. Luckily in a 1966 Beetle you have only two horn wires. He cut the brown wire (negative) in half, stripped it, ran a third cable off of it that could ground the horn and make it sound. He ran that cable all the way up to the glove box, where he had decided he would put his Arduino.
Now he connected the Arduino with the GPS and the relay:
- Arduino 5V -> Relay VCC & Pin 2 of GPS Breakout
- Arduino GND -> Relay GND
- Arduino GND -> Pin 1 or 5 of GPS Breakout
- Arduino Pin 11 -> IN of Relay
- Arduino Pin 0 (RX) -> GPS Breakout Pin 4
- Arduino Pin 1 (TX) -> GPS Breakout Pin 3
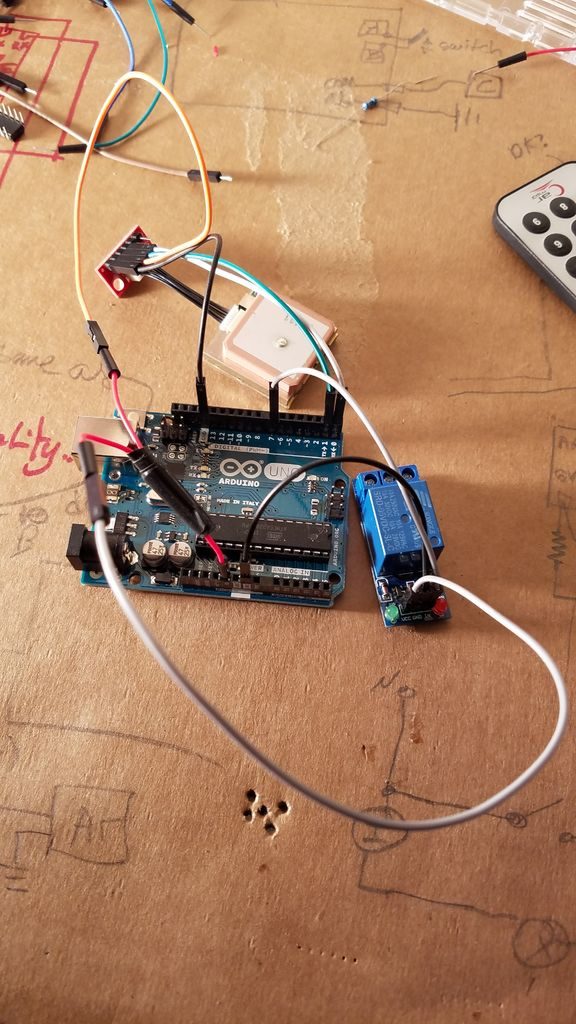
Once the connection is made, he put all in a plastic food-box that he could put in the glovebox, to make the system secret and safe. He had to drill the glovebox, since the relay was installed on the Arduino and cables needed to go in and out to the horn.
After you’ve connected everything, you’re done!
Now you have your anti-theft system and It could be expanded to flash the lights or even text the owner with the location of the car…you just have to try it (or not if you’re lucky)!!
https://www.youtube.com/watch?v=zc1E3enaPFo
