After having seen the features and potentialities of RFTide modules, let’s see how to create a small network that has all the features of an advanced mesh network.
To create a network with the RFTide modules, it is necessary to have at your disposal at least a Master unit.

For the moment, let’s say that the “commercial” solutions to create a Master unit are:
- Remote Control for networks having up to 5 modules;
- USB-dongle to be used with a PC and dedicated software (Aurel RFTide-v1.0);
- Gateway based on RaspBerryPI with USB-dongle.
In this article we shall consider the first two solutions.
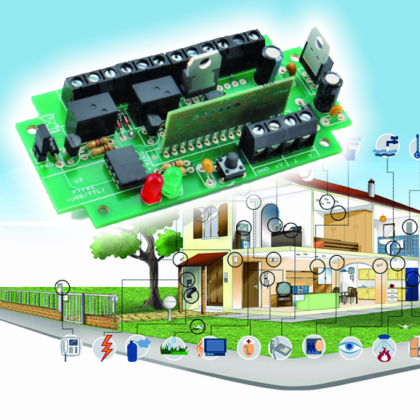
The RFTide module on breadboard

RFTide modules present themselves as a printed circuit board of the size of 39x17x2mm, with a 15 pin strip inline connector, pitch 2,54mm. To create a Slave unit, it is necessary to interface the module with some hardware; the bare minimum needed to use it requires to connect the LEARN button to it and, to test its functioning, two buttons for the inputs and two LEDs on the outputs. Everything can be easily assembled on a breadboard, by following the plan provided with this article. To turn on the LEDs, placed at the GPOUT outputs, we take advantage of the pull-up resistence that is already present within the module.
For this simple Slave unit, it is possible to use a RFTide module, and therefore the powering must strictly be stabilized at 5V value; you have to consider that the absorption doesn’t exceed 50 mA.
For those who wish a more reliable, higher quality solution, a breakout board may be chosen: it is supplied as an to-assembly kit in our store.

This breakout board allows to rapidly use RFTide modules as Slave units, but that may act as Master unit as well. It contains a 5V RFTide module, one supply stage, two input and output pins that are available on a convenient terminal board.
The printed circuit board is supplied as ready for use and screenprinted, and it is sufficient to weld the few components to create a general purpose Slave unit. This circuit has been thought, in fact, to be directly wired at switches and limit switches and, by means of two relays, one may directly command small low voltage engines.
By adding externally some power relays, it is however possible to manage power loads, even at 230 Vac. The antenna may be a simple piece of rigid copper wire, 85 mm long, or a specific flexible antenna for applications in containers, tuned on the frequency of 868 MHz. The printed circuit board also has a connector for serial communication, to which a USB/TTL converter (which is useful to interface the module to a PC) can be easily connected; the connector is compatible with the FT782M USB/serial converter. For his power source, it is enough to use a small non-stabilized 9-12 V power supply. This breakout has the availability of two GPIN0 and GPIN1 digital inputs in positive logic, that is to say, the closing contact is connected between the input and +5V. Two digital outputs of the relay ON/OFF type are available, and the GPOUT0 pin can be configured as PWM output, depending on the usage necessities of the module.
In the ON/OFF mode, the two lines are used to activate two relays but, by inverting the jumpers on PWM, the GPOUT0 output will be available on the terminal named PWM, by means of a power MOSFET. A jumper is available for the module activation, and by disconnecting it the module goes in standby mode, with very low consumption. The P1 button can be used for the LEARN procedure, that is to say, to include a module within the network; to complete the module there is a LED operating as power supply monitor and a learning confirmation LED.


BOM
RFTIDE IN/OUT ()
R1: 470 ohm
R2: 470 ohm
R3: 10 kohm
R4: 4,7 kohm
R5: 10 kohm
R6: 4,7 kohm
C1: 100 nF
C2: 100 nF
C3: 220 µF 25 VL
C4: 220 µF 25 VL
C5: 100 nF
T1: BC547
T2: BC547
T3: STP36NF06
P1: Microswitch
LD1: LED 5 mm green
LD2: LED 5 mm red
U1: RFTIDE (RFT-868-5V)
U2: 7805
D1: 1N4148
D2: 1N4007
D3: 1N4007
D4: 1N4148
RL1: Relé 5V
RL2: Relé 5V
Network Creation
Let’s suppose that we have at our disposal an original Aurel Remote Control, having five Master channels, and that we want to configure a very simple network with a stand-alone Slave module. The very first thing to do is to associate the Slave unit with the Master unit and to create a first network with a node.
Learning procedure (PWM or MOTOR mode)
The learning procedure is needed to insert the module in the network, and to assign his address to it. As a first thing, turn on the Slave module, then press the LEARN button until the green LED (that is connected to the module’s Pin 9) is lighted.
Within fifteen seconds, by using the remote control (operating as a Master), you have to select the channel you want to associate the module with (CH+ and CH- buttons), and then you have to press the PROG1 button to proceed with the association.
If during this phase the MODE jumper is connected, the PWM mode will be programmed, otherwise the MOTOR mode will be configured. If the procedure comes to a successful conclusion, the Slave unit’s LED will flash for a few seconds, while the LED turning off without flashing means that the procedure failed. We remind you that in PWM mode, the duty cycle can be set up remotely at six different values, by means of the UP and DOWN buttons: 0%, 0,4%, 1,6%, 6,2%, 25% e 100%. To modify the default values, it is necessary to access the network with a more evolved Master unit.
Learning procedure (SENSOR mode)
It is possible to configure the module in sensor mode, so that at the activation of an input, a command to another module is sent: for example a wind sensor may be used to make a tent return.
Press the LEARN button of the module for about two seconds, the LED will turn on.
Press the CH+ (or the CH-) button, to activate the remote control (operating as a master) and then press the PROG2 button to send the PROG_SENSOR_MESSAGE command to the sensor module. If the procedure comes to a successful conclusion, the module’s LED will flash for a few seconds, while the LED turning off means that the procedure failed.
Press again the LEARN button of the Slave unit to set up the function that will be started in case the GPIN0 input (operating as a trigger) is activated.
On the remote control, press the function you wish to activate (UP, STOP, DOWN); up to a maximum of three function can be memorized. To modify the operations saved in the Slave module, it is necessary to reset it first, and then to repeat the programming operations.
Network management via remote control
By means of the CH- and CH+ buttons, it is possible to select the Slave unit to which to send the command, and the corresponding LED will be lit. If all the LEDs are lit it means that the command will be sent to all the modules (broadcast).
If the Slave unit is configured for the engine management, by using the UP, STOP, DOWN buttons it is possible to activate the corresponding function. If the limit switches have been wired as well, the Slave unit will provide to consequently stop the engine: a useful function for the management of an awning, in an autonomous way.
If in the remote control the MODE jumper is connected, with the UP and DOWN buttons it will then be possible to regulate the duty cycle of the PWM output, while with the STOP button it will be possible to activate or deactivate the PWM output (PWM_ON and PWM_OFF commands).
If the UP or DOWN command is sent, an engine state request is periodically sent until the engine is stopped, by means of the STOP command or because of a limit switch. After having sent the command, the Master unit waits for the reply from the Slave unit; during the request concerning the operating state, the notification LED of the remote control will become orange, and will assume different colours depending on the state of the engine.
| Used Profile | Orange LED | Blue LED | Red LED | Green LED |
| Engine | Awaiting Reply | Engine in motion and inactive limit switches | Limit switch closed position reached | Limit switch open position reached |
| PWM | Awaiting Reply | – | PWM ON | PWM OFF |
Slave unit reset
It is possible to restore the factory settings for each Slave device, by means of the following procedure:
Press the LEARN button on the Slave unit for about two seconds or, as an alternative, the PROG1 button on the remote control soon after having activated it, by pressing the CH+ or CH- buttons.
Press again the LEARN button for two seconds more, the LED will start to flash, after two seconds the LED will turn off to indicate that the reset procedure is completed.
Using as a repeater
A Slave module can be used as a signal repeater to extend the network range. Press the LEARN button for about two seconds on the Slave module you want to use as a repeater, and the module LED will light up. Within fifteen seconds, select the BROADCAST MODE function (all channel LEDs lit) on the remote control and then press the PROG1 button. The LED of the Slave unit will flash for some seconds and then will turn off if the procedure came to a successful conclusion.
As you could see, it’s really easy to create a network, and with the remote control the main commands can be managed in an easy and immediate way; in the same way up to 5 nodes can be associated and managed. We mainly created a network that could be suitable for the management of some tent or rolling shutters and nothing more. Some modules, however, may interact among them for the closing of the rolling shutters, in the case a wind sensor gives the alarm.
Use of the USB Dongle by RFTide
Here we’re talking about a serialized RFTide module, to which a USB-serial converter has been added, one that can be directly interfaced to a PC; even the FT1083 circuit, with a serialized module on board and the USB-serial converter, substantially carries out the same functions of the USB Dongle. As soon as the device is connected, it is recognized as a serial virtual port, similarly to what happens with Arduino. In the download area of the Aurel website, upon registration, it is possible to freely download the software (for Windows) that allows the complete management of the whole network, and that allows to configure the parameters that otherwise cannot be modified with the remote control alone. Once the peripheral has been connected, Windows tries to install the drivers, if it fails it is necessary to install them manually, by accessing the “devices management” of the operative system. The drivers are available at the address http://www.ftdichip.com/Drivers/VCP.htm.

The RFTide software doesn’t require installation and it is enough to start it for it to be operational; by clicking on the network populate button, the software will interrogate the network and create a list of the modules that are present in it, with the profile associated to them. If there is no other active module, the list will contain the only Master module, configured at the address zero; any other Slave unit associated with another remote control is not detected, because it is part of a different network.

To associate a Slave module to the network you just need to follow the simple LEARN procedure, that we describe as follows: press the LEARN button on the Slave unit that we want to include in the network, the LED will light up. Let’s go now to the software of the network install box, and within the prog address field we shall type in the address that we want to assign to the new module, and specify the wanted profile type, and then click on PROGR. If the Slave unit’s LED flashes for a few times, the module has been correctly associated. If we want to make some simple tests, we shall not set any profile (no profile), so that we have the freedom to activate all the functions remotely, by means of software: in fact in this case we might set up manually, on the remote module, the outputs state or read the inputs state.

To verify that everything is ok, let’s interrogate the module, by typing in, within the Ping Address field of the Ping box, the module address (1, in our case) and by clicking on the PING button, thus obtaining the module operating state.
We may interact with the module by using the I/O box commands, activating or deactivating the outputs or reading the inputs state, even if they’re still reporting the value of the two ADCs, the values will always be zero (only for the 5V module).

In the same way, we could associate another module to the network.
In the network install box, at the ping address entry, do specify the module address you want to interact with and click on Ping to interrogate the module and show its operating state and the selected profile. To modify the profile, use the Prog box by typing in again at the Prog Address field the device address and the wanted profile. Remember that only a module at a time can be programmed, otherwise more modules will have the same address.
If the module is configured as motor, you may use the commands of the Motor box to interact with the module, the READ button permits to know the states of the limit switches and of the engine, while with the UP, DOWN, STOP buttons it is possible to manage the engine state. If you have selected the PWM profile, you may use the PWM box to set up the values or to modify the default values.

In-depth studies
The software proposed by Aurel is just an example that permits to fully understand the potentialities of their modules, and nothing forbids to create a software with a custom interface for the usage in a specific application; for this purpose, it is however necessary to study attentively the communication protocol, as published in the RFTide-User-Guide, and available at the Aurel website: we will describe it with an article in the near future.
Every non-serialized module, connected to a programmable logic, may perform functions as a Master unit, but the network will necessarily have 0x000 Network ID and it will not be possible to create independent networks. It is not possible to modify the Network ID because otherwise unpleasant interferences between networks might occur; if for example, in a block of flats an apartment has a certain ID, it is necessary to assure that the adjacent apartment has a different ID, to avoid unpleasant interferences. For this reason serialized modules exist, and they have a distinct own Network ID (assigned by the manufacturer and unmodifiable); with them it is possible to create a Master function and instruct a new network. All the Slave units associated with a certain Master unit will be instructed to interact only with other modules having a Network ID, identical to the one of the Master unit.
From Store
