

With this short guide we release today, we will explain you how to use your Arduino Yun to do something that was never accomplished before with a board of such family.
We’ll face a real embedded project, with its set of sensors and management and control applications. Thanks to our experiment shield (more info), you’ll manage the sensors via a web browser, having no need of writing a software.

Connect a button that is open when at rest between the ground of the shield and the pin 7. Connect the central pin of a 47Kohm potentiometer to the A5 pin and the ends to the ground and to the positive of the shield. Finally connect a switch to pin 4 and one end to the ground. For a better visual effect, although not necessary, connect a common cathode RGB LED to the grounded cathode and to the R, G and B clamps, respectively to pins 3 , 5 and 6 with a limiting resistor of 330 ohms on each clamp.
The “bricks” that must be used for the project are the shield , the ” Bridge” example sketch and… a web browser.
Turn on the Arduino Yun and connect it to the network.
Open the development IDE and the “File” menu and pick:
“Examples” >> ” Bridge” >> ” Bridge”
Now load the sketch on the Arduino ATmega32u4 microcontroller of the Arduino Yun by clicking on the “Upload” button .
After the sketch has been downloaded, open a browser on your PC and try to control the I / O of the shield by using REST technology in native mode, or by writing the URI directly in the browser navigation field.
The URI REST format, implemented by Arduino Yun, follows this form:
http://<Arduino_Yún_Address>/arduino /<status>/<pin>/value> (optional)>)

For example, the URI:
http://<Arduino_Yún_Address>/arduino/mode/13/output
asks to the Bridge sketch to set Arduino’s pin 13 as an output : in this case the pin associated to the relay in the one at the upper left.
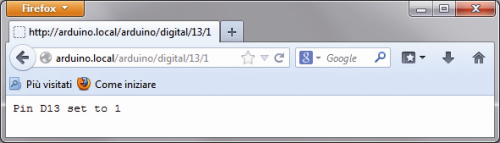
With the URI:
http://<Arduino_Yún_Address>/arduino/digital/13/1
you bring pin 13 to high, by closing the relay and giving light to the LED, while with:
http://<Arduino_Yún_Address>/arduino/digital/13/0
the relay is opened and the LED is turned off. You can repeat the experience with the pins 8, 9, 10, 11 and 12.
Let ‘s now try to query the status of a digital input pin. For example, pin 7.
http://<Arduino_Yún_Address>/arduino/digital/7
Change the pin status by holding the P1 button connected between pin 7 and ground and then type again the command, to see the different results.
The same is valid for pins 5 and 6.
Now it is the turn of analog input pins. Try to query the A5 pin, which has been connected to the RV1 potentiometer.

Use the URI :
http://<Arduino_Yún_Address>/arduino/analog/5
Here, too, the same mechanism of other analog input pins (A1 to A5) can be applied.
The digital pins 3, 5 and 6 can be used as analog output pins. Try with pin 3, to which we connected a LED with a related limiting resistor, by typing the URI:
http://<Arduino_Yún_Address>/arduino/analog/3/123
You’ll see the LED lighting up to about half the maximum brightness. With the “0” value you blow out the LED and with the 255 value you’ll turn it on at full brightness. The same goes for pins 5 and 6.
Pretty straightforward isn’t it?

[…] With this short guide we release today, we will explain you how to use your Arduino Yun to do something that was never accomplished before with a board of such family. We’ll face a real embedded project, with its set of sensors and management and control applications. Thanks to our experiment shield (more info), you’ll manage the sensors via a web browser, having no need of writing a software. Connect a button that is open when at rest between the ground of the shield and the pin 7. Connect the central pin of a 47Kohm potentiometer to the A5 pin and the ends to the ground and to the positive of the shield. Finally connect a switch to pin 4 and one end to the ground. For a better visual effect, although not necessary, connect a common cathode RGB LED to the grounded cathode and to the R, G and B clamps, respectively to pins 3 , 5 and 6 with a limiting resistor of 330 ohms on each clamp. The "bricks" that must be used for the project are the shield […] […]
is it possible to issue the REST commands from outside the private network? like http://218.xxx.xx.xxx/arduino/analog/5 where 218* is your public address.
Yes, but you have to configure you router.
Here is a tutorial on how to connect to the Yun from outside the private network without configuring the router: http://asynkronix.se/internet-of-things-with-arduino-yun-and-yaler/
[…] Using REST with Arduino YunPosted 2 weeks ago […]
[…] experimented with REST technology and with the “Bridge” communication mode, we can introduce a project that achieves something […]
is the software available?
here
https://github.com/open-electronics/YunAndAjax