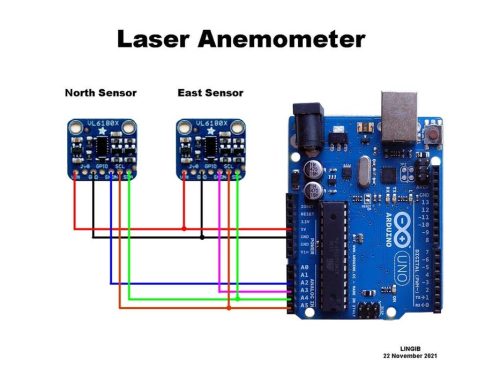
In this project we will see how to make an anemometer (instrument for measuring wind speed and direction) using an Arduino Uno R3, two VL6180X laser distance modules and a section of tube made of plastic or similar materials.
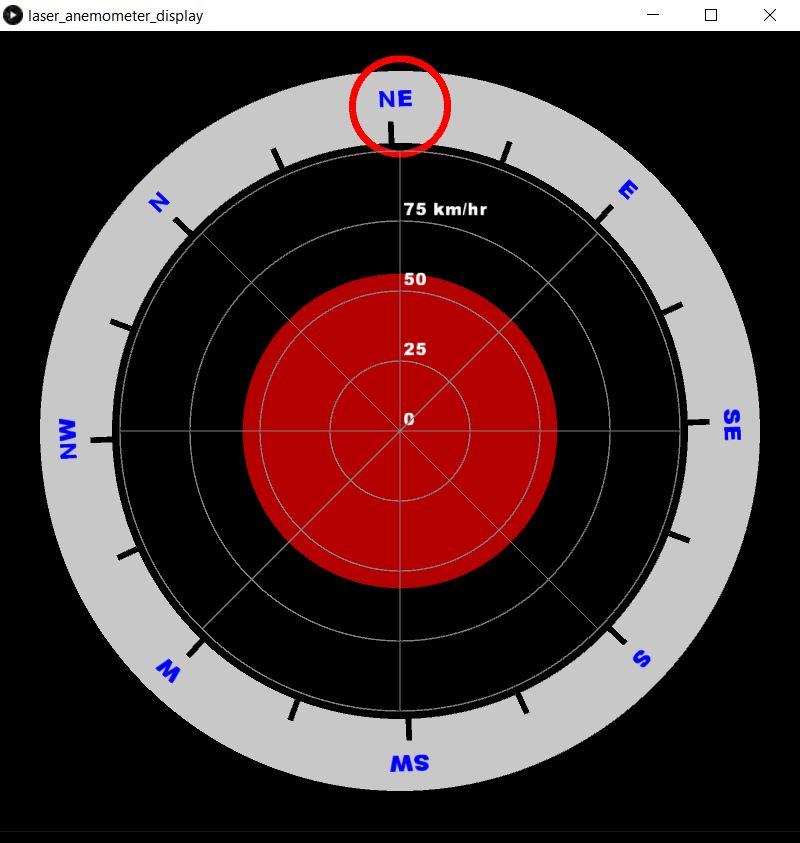
We will also use Processing3 to display wind speed and direction, the latter being independent of tube size, while wind speed sensitivity depends on size and amount of damping applied.
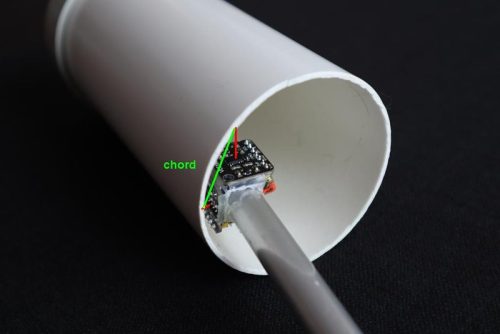
Let’s see on a theoretical level how the sistem works. The cross section of the tube is a circle; the points where the two laser beams touch the inside of a tube define the end points of a chord on this circle; the length of this string varies when the tube is inclined and therefore knowing the radius of the tube it is possible to calculate the X and Y displacement through which the speed and direction of the wind can be calculated.

Dear Sir/Madame,
With great interest I follow you Arduino/VL6180X anemometer project as I build it accordingly. Now I challenge you, as I am incapable of doing so, to mount this project on board of a sailing vessel with of course no fysical North reference. Instead on board you rely on a magnetic North or compass North. I an curious what you thought are. Thank you in advance,
Walter
thank you for your kind message and for building the Arduino/VL6180X anemometer.
On a sailing vessel without a fixed North reference, the usual approach is:
add a 3-axis magnetometer (better a 9-DOF IMU with tilt compensation) to get the boat’s magnetic heading; perform hard/soft-iron calibration;
align the anemometer with the boat’s longitudinal axis and compute the apparent wind angle as sensor yaw minus boat heading;
if you also want true wind, use GPS COG/SOG and subtract the boat’s velocity vector from the apparent wind (vector math).
Practical notes: place sensors high and clear of rigging/turbulence; keep the magnetometer away from steel, speakers, and power cables; re-calibrate after installation.