- How to Build a 1000W ZVS Induction Heater Using a Resonant RLC CircuitPosted 4 weeks ago
- How to Adjust X and Y Axis Scale in Arduino Serial Plotter (No Extra Software Needed)Posted 10 months ago
- Elettronici Entusiasti: Inspiring Makers at Maker Faire Rome 2024Posted 10 months ago
- makeITcircular 2024 content launched – Part of Maker Faire Rome 2024Posted 1 year ago
- Application For Maker Faire Rome 2024: Deadline June 20thPosted 1 year ago
- Building a 3D Digital Clock with ArduinoPosted 2 years ago
- Creating a controller for Minecraft with realistic body movements using ArduinoPosted 2 years ago
- Snowflake with ArduinoPosted 2 years ago
- Holographic Christmas TreePosted 2 years ago
- Segstick: Build Your Own Self-Balancing Vehicle in Just 2 Days with ArduinoPosted 2 years ago
Arduino Wedding Photo Booth – 3D Printed Parts, Automated and Low Budget
This is how to build your own Automated Photo Booth for less than hiring one (if you can lay your hands on a DSLR).
You can customise the housing to suit your event/wedding and as it’s controlled by an Arduino Nano you don’t need anyone to ‘man it’ throughout the night.
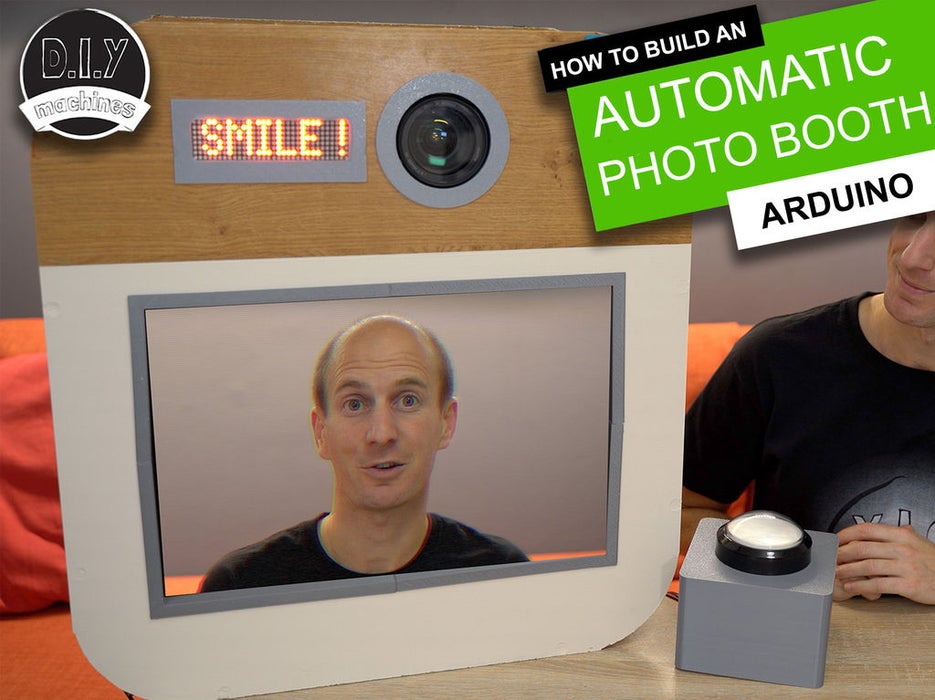
The guests just press the giant arcade button and the photo booth guides them through their own photoshoot sequence. :) Three photos are taken 10 seconds apart (you can change this in the code if you wanted to). The photos are displayed after each shot on the large screen. High-quality copies of the photos are saved onto the camera memory card for retrieval after the party.