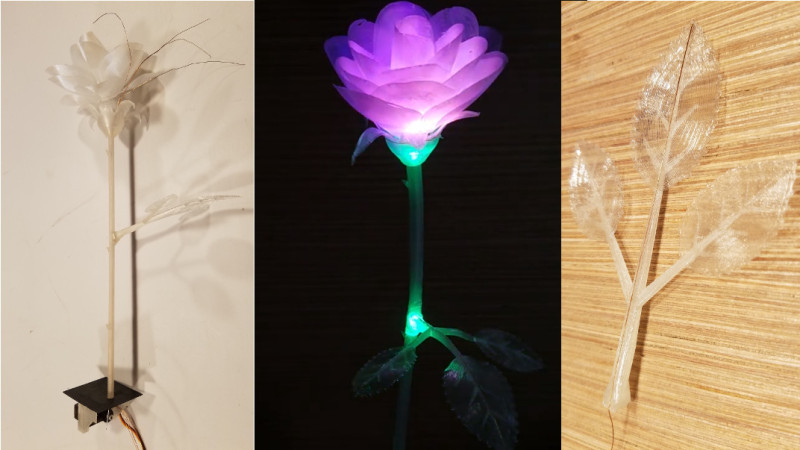
Daren Schwenke’s 3D printed blooming rose embeds a capacitive touch sensor in one of the leaves, which trips an Arduino-controlled actuator that changes the rose’s lighting and causes the petals to splay open or fold closed.
These petals are 3D printed and then shaped over a hot chandelier bulb.
“The petals are printed flat in nylon, then formed over a hot incandescent chandelier bulb. The stem and leaves are also printed, but the side stem has a piece of magnet wire embedded in the print as a capacitive touch sensor; when the leaf is touched, the rose blossom opens or closes. Magnet wire for the LEDs and a connecting rod for the mechanics run through the main stem to the base, where a 9g servo is responsible for controlling the bloom. The whole thing is controlled, naturally, with an Arduino”.
The project is completely open-source. Hardware and software are available on Hackaday project’s page.
Further information are available in the video below.
