- Building a 3D Digital Clock with ArduinoPosted 3 months ago
- Creating a controller for Minecraft with realistic body movements using ArduinoPosted 4 months ago
- Snowflake with ArduinoPosted 4 months ago
- Holographic Christmas TreePosted 4 months ago
- Segstick: Build Your Own Self-Balancing Vehicle in Just 2 Days with ArduinoPosted 5 months ago
- ZSWatch: An Open-Source Smartwatch Project Based on the Zephyr Operating SystemPosted 6 months ago
- What is IoT and which devices to usePosted 6 months ago
- Maker Faire Rome Unveils Thrilling “Padel Smash Future” Pavilion for Sports EnthusiastsPosted 6 months ago
- Make your curtains smartPosted 7 months ago
- Configuring an ESP8266 for Battery PowerPosted 7 months ago
How to send and receive SMS with GSM/GPRS & GPS shield
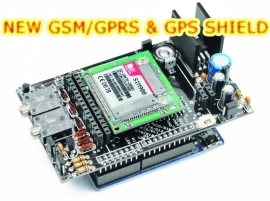
This post is one in a series showing you the main features of the GSM /GPRS/GPS shield and of its related library. The examples are great to have inspiration and reuse the material to create your own solutions. We already talked about how to use the shield to make calls, send DTMF tones and check whether the sender of an incoming call and command was in the trusted phonebook.
This is possible thanks to the call.h class contained within the call management library. Here we will show you few examples about how to deal with SMS management. The sms.h file, shows you how to send a text message in correspondence to a particular condition or how to extrapolate the content of a received text message and how to interprete the commands contained within it.

EXAMPLE 1
Let’s start from a sketch that can be used to send a text message to a preset number in case an alarm condition is happening. This example is similar to the one we shown regarding placing calls, it has been obviously tweaked to send a text message instead of placing a call.
In this case, the triggering condition is reached when the Arduino board reads an analog value that is below to one that has been preset as a threshold value and the notification is done by sending a text message.
As for each sketch concerning this shield, first thing to do is to include the library (in this case the sms.h file) and then instantiate an object. This procedure can be done with the following commands:
#include “sms.h”
SMSGSM sms;
Each function belonging to this class must be initialized as follows:
object_name.function_name(parameters)
In case the alarm status condition is verified, in order to send a message you simply call the following function:
sms.SendSMS(number,message);
The first parameter contains the message recipient, while the second one is the string containing the message body.
For example:
char message[]=“Hello world”;
char number[]=“3921234567”;
sms.SendSMS(number,message);
In this way the string “Hello world” will be sent.
In this example, in addition to sending the static string containing the warning message, we’ve also chosen to communicate the value that triggered the alarm condition: we must therefore transform the analog integer value read from the converter, in a string to be concatenated to the static one.
The function that takes care of this conversion is the on that follows:
itoa(int integer, char* string, int base)
where base is usually 10 since we work in decimal base. If we were to work with numbers in different bases we just need to change this value as appropriate.
The function used to concatenate a string to another is:
strcat(char* string1, char* string2)
#include "SIM900.h"

#include <SoftwareSerial.h>

#include "sms.h"

SMSGSM sms;

char number[]="3921234567";

int value=0;

int value_old=0;

char message[40];

char value_str[4];

int pin=A0;

void setup()

{

 Serial.begin(9600);

 if (gsm.begin(2400))

   Serial.println("\nstatus=READY");

 else Serial.println("\nstatus=IDLE");

 value=analogRead(pin);

 value_old=analogRead(pin);

};

void loop()

{

 value=analogRead(pin);

 Serial.println(value);

 if(value<50&&value_old>=50){

   message[0]='\0';

   strcat(message,"ALLARME LOW, VAL=");

   itoa(value,value_str,10);

   strcat(message,value_str);

   sms.SendSMS(number,message);

 }

 value_old=value;

 delay(1000);

};
|
As said in the previous post, it is highly recommended to set a hysteresis or a low-pass filter to avoid repeatedly sending text messages in the case of oscillations around the threshold value.
In case you wish to add a message to communicate the return to the starting condition, you just need add the following piece of code before the update of the value_old variable.
else if(value>50&&value_old<=50){

 message[0]='\0';

 strcat(message,"ALLARME HIGH, VAL=");

 itoa(value,value_str,10);

 strcat(message,value_str);

 sms.SendSMS(number,message);

}
|

EXAMPLE 2
Let’s have a look to the sketch used to interpret the commands received via text message. We’ll check the status of a digital output by sending simple text messages to the shield.
Will be possible, therefore, to give the Arduino some remote commands, by simply sending a text message.
To keep a minimum security level (in order to prevent unauthorized persons to execute commands) without imposing limitations to the sender number, the use of temporary password is provided.strstr(char* string, char* string2)
The first step is to check the presence of a new, unread, message and, in case, store the position in which it is stored on the SIM thanks to the following command:
sms.IsSMSPresent(SMS_UNREAD);
which returns an integer containing the position of the first unread message. If no new messages are found it will return 0.
To analyze the content you need to ‘open’ the message and read the contents.
sms.GetSMS((int)pos,number,message,180);
The GetSMS function takes care of reading the message in the position shown and to save the sender number and the message body (up to a maximum of characters as indicated by the last parameter).
Once this is done you just need to control the text of the message to interpret the commands that have been sent.
First, we’ll verify that the password is contained in the message body (the password used in the examplse is ‘testpwd‘). To do this we’ll use the strstr(char* string, char* string2) function that checks if the second string passed is contained within the first, returning a pointer to the first character of the substring.
p=strstr(message,”testpwd”);
In case the substring is not present, a NULL pointer will be returned.
To verify the correct authentication simply insert the remaining code portion within the condition:
if(p){ […] }
Let’s recall that if(p) is equivalent to writing if (!=NULL).
At this point, when authentication is done, as done previously for the password, we’ll check the presence of predetermined command strings. Once we’ve got the message, we’ll proceed with the interpretation, by enabling or disabling the output.
Finally, we will delete the message, to avoid filling up the memory available on the SIM card. This will be done with the command:
sms.DeleteSMS((int)pos);
#include "SIM900.h"

#include <SoftwareSerial.h>

#include "sms.h"

SMSGSM sms;

char number[]="3921234567";

char message[180];

char pos;

char *p;

void setup()

{

 Serial.begin(9600);

 if (gsm.begin(2400))

   Serial.println("\nstatus=READY");

 else Serial.println("\nstatus=IDLE");

};

void loop()

{

 pos=sms.IsSMSPresent(SMS_UNREAD);

 Serial.println((int)pos);

 if((int)pos>0&&(int)pos<=20){

   Serial.print("NUOVO MESSAGGIO, POS=");

   Serial.println((int)pos);

   message[0]='\0';

   sms.GetSMS((int)pos,number,message,180);

   p=strstr(message,"testpwd");

   if(p){

     Serial.println("PSWD OK");

     p=strstr(message,"LEDON");

     if(p){

       Serial.println("LED ON");

       digitalWrite(13,HIGH);

     }

     else{

       p=strstr(message,"LEDOFF");

       if(p){

         Serial.println("LED OFF");

         digitalWrite(13,LOW);

       }

     }

   }

   sms.DeleteSMS((int)pos);

 }

 delay(5000);

};
|

EXAMPLE 3
As previously mentioned, we can provide authentication also by checking the sender.
In the same way as, in previous examples, we checked whether the sender of an incoming call was authorized, you can do the same operation with SMS sender.
sms.GetAuthorizedSMS((int)pos,number,message,180,8,10);
Saving the trusted contacts on the within a specific range of the SIM will be enough: we just need to check what’s returned by the function in which we pass the range using the last two parameters.
In this case the authorized number is saved between position 8 and position 10 (both included) of the SIM.
if(stat==GETSMS_AUTH_SMS){
Thanks to the previous condition we will enter the routine associated with the condition in which the SMS is received from a trusted number.
Differently from the previous case, in this example we will analyze a string containing the logic states (0 or 1) that must be set on the digital outputs (for example: “LEDCONF0000” or “LEDCONF1001” and so on.)
Using the substrings search function we will identify the command for the allocation of the states and then we will move forward analyzing it character by character and then setting the appropriate status to its output.
In this example, the “LEDCONF0000” string, sent to turn off all outputs, is composed of the first part (LEDCONF) that relates to the command type (in fact we could send different commands within a single message) and by a following part containining 0000 as the states to be set on the outputs ranging from 9 to 12.
Recalling that the search function, if successful, returns a pointer to the first character of the substring, you will need to move forward of a number of characters that is sufficient to reach the first value containing the information on the first output.
We’ll do this thanks to the strlen(char* string) function that gives back an integer with the length of the string passed as a parameter.
Then we translate the pointer of a number of characters that is equal to the length of the command:
p=p+strlen(“LEDCONF”);
In this way the p pointer will refer to the first numeric character.
will be sufficient to check if this is equal to 1 or 0 to activate or not the output to it associated with it.
if(p[0]==’1′)
For your convenience we will put everything in a loop equipped with some diagnostic messages (not strictly necessary) sent to the hardware serial port.
As we did before, at the end of the cycle we first delete the SMS and then add a a few seconds delay to avoid making continuous queries to the shield.
#include "SIM900.h"

#include <SoftwareSerial.h>

#include "sms.h"

SMSGSM sms;

char number[]="3921234567";

char message[180];

byte stat;

char pos;

char *p;

int i=0;

void setup()

{

 Serial.begin(9600);

 if (gsm.begin(2400))

   Serial.println("\nstatus=READY");

 else Serial.println("\nstatus=IDLE");

 pinMode(9,OUTPUT);

 digitalWrite(9,HIGH);

 pinMode(10,OUTPUT);

 digitalWrite(10,HIGH);

 pinMode(11,OUTPUT);

 digitalWrite(11,LOW);

 pinMode(12,OUTPUT);

 digitalWrite(12,LOW);

 pinMode(13,OUTPUT);

 digitalWrite(13,LOW);

};

void loop()

{

 pos=sms.IsSMSPresent(SMS_UNREAD);

 Serial.println((int)pos);

 if((int)pos>0&&(int)pos<=20){

   Serial.print("NUOVO MESSAGGIO, POS=");

   Serial.println((int)pos);

   message[0]='\0';

   stat=sms.GetAuthorizedSMS((int)pos,number,message,180,8,10);

   if(stat==GETSMS_AUTH_SMS){

     p=strstr(message,"LEDCONF");

     if(p){

       p=p+strlen("LEDCONF");

       i=9;

       while(p[0]!='\0'&&i<13){

         Serial.print("P= ");

         Serial.write(p[0]);

         Serial.println("");

         if(p[0]=='1'){

           Serial.print(i);

           Serial.println(" HIGH");

           digitalWrite(i,HIGH);

         }

         else if (p[0]=='0'){

           Serial.print(i);

           Serial.println(" LOW");

           digitalWrite(i,LOW);

         }

         Serial.println("");

         p++;

         i++;

       }

     }

   }

   //Serial.println(message);

   sms.DeleteSMS((int)pos);

 }

 delay(5000);

};
|
EXAMPLE 4
In this last example we chosen to create a sketch using both the classes we created: that for the management of phone calls and that to manage SMS.
Upon the reception of a call from a trusted number, the program will check the status of the inputs (digital ones have been chosen but you can be easily extend to analog ones) and will communicate this information through an SMS to a specified number.
Since this sketch uses functions already explained in this and in the previous article, we will just post the code without explaining in detail each step.
#include "SIM900.h"

#include <SoftwareSerial.h>

#include "sms.h"

#include "call.h";

CallGSM call;

SMSGSM sms;

char number[]="3921234567";

char message[180];

byte state;

int i=0;

char pin_str[2];

char pin_val[1];

void setup()

{

 Serial.begin(9600);

 Serial.println("GSM Shield testing.");

 if (gsm.begin(2400))

   Serial.println("\nstatus=READY");

 else Serial.println("\nstatus=IDLE");

 pinMode(9,INPUT);

 pinMode(10,INPUT);

 pinMode(11,INPUT);

 pinMode(12,INPUT);

 pinMode(13,INPUT);

};

void loop()

{

 number[0]='\0';

 state=call.CallStatusWithAuth(number,8,10);

 if(state==CALL_INCOM_VOICE_AUTH){

   Serial.println("Chiamata in corso da numero autorizzato");

   Serial.println(number);

   call.HangUp();

   message[0]='\0';

   for (i=9; i<=13; i++){

     strcat(message,"PIN");

     itoa(i,pin_str,10);

     strcat(message,pin_str);

     strcat(message,"=");

     itoa(digitalRead(i),pin_val,10);

     strcat(message,pin_val);

     strcat(message," ");

   }

   delay(2000);

   Serial.println("INVIO SMS");

   sms.SendSMS(number,message);

 }

 delay(1000);

};
|

Related Posts


99 Comments
Leave a Reply
-
 Arduino ISP (In System Programming) and stand-alone circuits
We use an Arduino to program other ATmega without...
- Posted 12 years ago
-

-

-
 GSM GPS shield for Arduino
Shield for Arduino designed and based on the module...
- Posted 12 years ago
-
 Small Breakout for SIM900 GSM Module
Some post ago we presented a PCB to mount...
- Posted 13 years ago
-
 Building a 3D Digital Clock with Arduino
Project to create a digital clock consisting...
- Posted 3 months ago
-
 Acoustic amplifier – in DIY Kit
This kit creates a microphone amplifier with an output...
- Posted 4 months ago
-
 Creating a controller for Minecraft with realistic body movements using Arduino
Project of a controller that maps body movements...
- Posted 4 months ago
-

-
 Holographic Christmas Tree
Beautiful project to create a Persistence of Vision...
- Posted 4 months ago
Pingback: How to send and receive SMS with GSM/GPRS &...
Pingback: The GSM/GPRS & GPS Shield: some Http connections examples | Open Electronics
Pingback: How to use GPS functions with GSM/GPRS & GPS shield | Open Electronics
Pingback: دریافت sms